
Operation Manual


543
USING PHOTOSHOP
3D
Last updated 12/5/2011
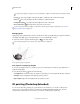
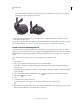
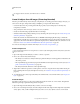
Panning hole constraint to increase depth
Create internal constraints from selections, work paths, or text
1 Do one of the following:
• Create a selection or path that falls entirely within the front surface of a repoussé object.
• For text objects that already have internal paths, like the letter A, skip to step 3.
2 Choose 3D > Repoussé > Create Constraints From Selection or Work Path.
3 In the Repoussé dialog box, click the triangle to expand the Internal Constraints section.
4 Choose a Type option. For Active or Hole, the following options are available:
Constraint tools Adjust the constraint curve and function similarly to 3D object tools. See “3D object and camera
tools (Photoshop Extended)” on page 522.
If the repoussé object contains multiple internal paths (for example, both ovals in the number 8), select each path
individually with the constraint tools.
Position coordinates Let you precisely place constraints in 3D space.
Side Lets you apply uniform Strength and Angle settings to both sides, or unique settings to each.
Each constraint curve has two sides; the orientation of those sides depends on how a curve divides the surface. The
Left and Right menu options reflect a vertical constraint. For a horizontal constraint, Left and Right mean up and
down, and for a closed constraint, those options mean inside and outside.
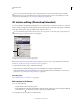
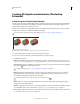
Side settings
A. Both creates consistent deformation. B. Left or Right allows for varied deformation.
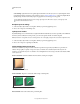
Strength Controls the level of inflation along the path.
Angle Controls the direction of inflation.
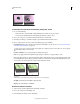
Remove an internal constraint
1 Select a 3D repoussé layer that includes an internal constraint.
2 Choose 3D > Repoussé > Edit In Repoussé.
3 In the Internal Constraints section, click Delete.
AB