
Operation Manual


542
USING PHOTOSHOP
3D
Last updated 12/5/2011
Scene Settings Lights in the form of a spherical panorama shine onto the object; choose a style of lights from the
menu. Render Settings control how object surfaces look. (See
“Select a render preset” on page 548.) Higher Mesh
Quality settings increase mesh density, improving appearance but reducing processing speed.
The Shaded and Solid Wireframe render settings superimpose the 3D mesh on objects, revealing any mesh
distortion that will distort textures.
Readjust repoussé settings
1 Select a text layer, layer mask, or work path to which you previously applied repoussé.
2 Choose 3D > Repoussé > Edit In Repoussé.
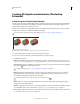
Split repoussé meshes
By default, the Repoussé command creates a single mesh with five materials. If you want to separately control different
elements (such as each letter in a string of text), you can create separate meshes for each closed path.
Note: If numerous closed paths exist, the resulting meshes can create highly complex 3D scenes that are difficult to edit.
1 Select a text layer, layer mask, or work path to which you previously applied repoussé.
2 Choose 3D > Repoussé > Split Repoussé Meshes.
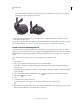
Understanding internal constraints
Internal constraints let you improve mesh resolution in specific areas, precisely vary inflation, or poke holes in
surfaces. Along a path you specify on a repoussé object, constraint curves extend away from the object for an
expansion, or toward the object for a contraction. You manipulate these curves using constraint tools that are similar
to 3D object tools.
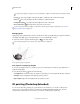
Inactive constraints Guarantee sufficient mesh resolution, creating smooth paths.
Inflated object with inactive constraint
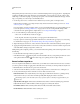
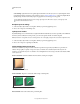
Active Constraints Expand or contract the surface along constraint paths.
Dragging active constraint to different position in 3D space
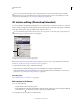
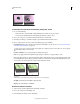
Hole Constraints Cut out the surface along constraint paths.