
Operation Manual

44
USING PHOTOSHOP
Workspace
Last updated 12/5/2011
Image Size
, and Canvas Size commands let you specify image width in terms of columns. Using columns is convenient when you
plan to import an image into a page-layout program, such as Adobe InDesign®, and you want the image to fit exactly
within a certain number of columns.
1 Choose Edit > Preferences > Units & Rulers (Windows) or Photoshop > Preferences > Units & Rulers (Mac OS).
2 Enter values for Width and Gutter.
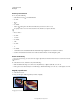
Position with the Ruler tool
The Ruler tool helps you position images or elements precisely. The Ruler tool calculates the distance between any
two points in the workspace. When you measure from one point to another, a nonprinting line is drawn, and the
options bar and Info panel show the following information:
• The starting location (X and Y)
• The horizontal (W) and vertical (H) distances traveled from the x and y axes
• The angle measured relative to the axis (A)
• The total length traveled (D1)
• The two lengths traveled (D1 and D2), when you use a protractor
All measurements except the angle are calculated in the unit of measure currently set in the Units & Rulers
preference dialog box.
If your document has an existing measuring line, selecting the Ruler tool causes it to be displayed.
Measure between two points
1 Select the Ruler tool . (If the Ruler isn’t visible, hold down the Eyedropper tool.)
2 Drag from the starting point to the ending point. Hold down the Shift key to constrain the tool to 45° increments.
3 To create a protractor from an existing measuring line, Alt-drag (Windows) or Option-drag (Mac OS) at an angle
from one end of the measuring line, or double-click the line and drag. Hold down the Shift key to constrain the tool
to multiples of 45°.
Edit a measuring line
1 Select the Ruler tool .
2 Do one of the following:
• To resize the line, drag one end of an existing measuring line.
• To move the line, place the pointer on the line away from either endpoint, and drag the line.
• To remove the line, place the pointer on the line away from either endpoint, and drag the line out of the image, or
click Clear in the tool options bar.
Note: You can drag out a measure line on an image feature that should be horizontal or vertical, and then choose Image >
Image Rotation
> Arbitrary. The correct angle of rotation required to straighten the image is automatically entered into
the Rotate Canvas dialog box.
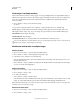
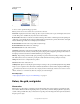
Position with guides and the grid
Guides and the grid help you position images or elements precisely. Guides appear as nonprinting lines that float over
the image. You can move and remove guides. You can also
lock them so that you don’t move them by accident.