
Operation Manual

43
USING PHOTOSHOP
Workspace
Last updated 12/5/2011
To show or hide rulers, choose View > Rulers.
Change a ruler’s zero origin
1 (Optional) Choose View > Snap To, then choose any combination of options from the submenu. This snaps the
ruler origin to guides, slices, or
document bounds. You can also snap to the grid.
2 Position the pointer over the intersection of the rulers in the upper-left corner of the window, and drag diagonally
down onto the image. A set of cross hairs appears, marking the new origin on the rulers.
You can hold down Shift as you drag to make the ruler origin snap to the ruler ticks.
To reset a ruler’s origin to its default value, double-click the upper-left corner of the ruler.
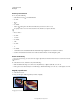
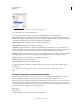
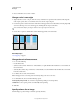
Dragging to create new ruler origin
More Help topics
“Use snapping” on page 46
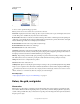
Change the unit of measurement
1 Do one of the following:
• Double-click a ruler.
• (Windows) Choose Edit > Preferences > Units & Rulers, or right-click the ruler and then choose a new unit from
the context menu.
• (Mac OS) Choose Photoshop > Preferences > Units & Rulers, or Control-click the ruler and then choose a new unit
from the context menu.
2 For Rulers, choose a unit of measurement.
Note: Changing the units on the Info panel automatically changes the units on the rulers.
3 For Point/Pica Size, choose from the following options:
PostScript (72 points per inch) Sets a unit size compatible for printing to a PostScript device.
Traditional Uses 72.27 points per inch, as traditionally used in printing.
4 Click OK.
Specify columns for an image
Columns help you position images or elements precisely. The New,