
Operation Manual

371
Last updated 12/5/2011
Chapter 13: Type
For detailed instructions, click the links below. To ask questions, request features, or report problems, visit
feedback.photoshop.com.
Creating type
Type in Adobe Photoshop consists of vector-based type outlines—mathematically defined shapes that describe the
letters, numbers, and symbols of a typeface. Many typefaces are available in more than one format, the most common
formats being Type 1 (also called PostScript fonts), TrueType, OpenType, New CID, and CID nonprotected (Japanese
only).
Photoshop preserves vector-based type outlines and uses them when you scale or resize type, save a PDF or EPS file,
or print the image to a PostScript printer. As a result, it’s possible to produce type with crisp, resolution-independent
edges.
If you import bitmap type layers created in older versions of Photoshop or Photoshop Elements, choose Layer > Type
> Update All Text Layers to convert to vector type.
See also
“Editing text” on page 374
“Asian type” on page 400
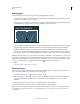
About type layers
Important: Type layers aren’t created for images in Multichannel, Bitmap, or Indexed Color mode, because these modes
don’t support layers. In
these modes, type appears on the background as rasterized text.
When you create type, a new type layer is added to the Layers panel. After you create a type layer, you can edit the type
and apply layer commands to it.
Once you make a change to a type layer that requires it to be rasterized, however, Photoshop converts the vector-based
type outlines to pixels. Rasterized type no longer has vector outlines and is uneditable as type. See
“Rasterize type
layers” on page 379.
You can make the following changes to a type layer and still edit the type:
• Change the orientation of type.
• Apply anti-aliasing.
• Convert between point type and paragraph type.
• Create a work path from type.
• Apply transformation commands from the Edit menu, except for Perspective and Distort.
Note: To transform part of the type layer, you must first rasterize the type layer.
• Use layer styles.
• Use fill shortcuts (see “Keys for painting” on page 619).
• Warp type to conform to a variety of shapes.