
Operation Manual


337
USING PHOTOSHOP
Drawing
Last updated 12/5/2011
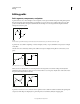
• Hold down Alt (Windows) or Option (Mac OS), and double-click to close the path with a straight segment.
Managing paths
Paths panel overview
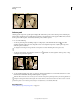
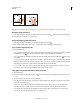
The Paths panel (Window > Paths) lists the name and a thumbnail image of each saved path, the current work path,
and the current vector mask. Turning thumbnails off can improve performance. To view a path, you must first select
it in the Paths panel.
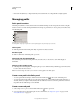
Paths panel
A. Saved path B. Temporary work path C. Vector mask path (appears only when shape layer is selected)
Select a path
❖ Click the path name in the Paths panel. Only one path can be selected at a time.
Deselect a path
❖ Click in a blank area of the Paths panel or press Esc.
Change the size of path thumbnails
Choose Panel Options from the Paths panel menu, and select a size, or select None to turn off the display of
thumbnails.
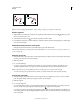
Change a path’s stacking order
❖ Select the path in the Paths panel, and drag the path up or down. When the heavy black line appears in the desired
location, release the mouse button.
Note: You cannot change the order of vector masks or working paths in the Paths panel.
Create a new path in the Paths panel
• To create a path without naming it, click the Create New Path button at the bottom of the Paths panel.
• To create and name a path, make sure no work path is selected. Choose New Path from the Paths panel menu, or
Alt-click (Windows) or Option-click (Mac
OS) the New Path button at the bottom of the panel. Enter a name for
the path in the New Path dialog box, and click
OK.
Create a new work path
1 Select a shape tool or a pen tool, and click the Paths button in the options bar.
2 Set tool-specific options, and draw the path. For more information, see “Shape tool options” on page 330 and
“About the Pen tools” on page 331.
A
B
C