
Operation Manual

258
USING PHOTOSHOP
Layers
Last updated 12/5/2011
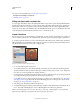
Flatten all layers
Flattening reduces file size by merging all visible layers into the background and discarding hidden layers. Any
transparent areas that remain are filled with white. When you save a flattened image, you cannot revert back to the
unflattened state; the layers are permanently merged.
Note: Converting an image between some color modes flattens the file. Save a copy of your file with all layers intact if you
want to edit the original image after the conversion.
1 Make sure that all the layers you want to keep are visible.
2 Choose Layer > Flatten Image, or choose Flatten Image from the Layers panel menu.
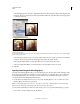
Layer opacity and blending
Specify overall and fill opacity for selected layers
A layer’s overall opacity determines to what degree it obscures or reveals the layer beneath it. A layer with 1% opacity
appears nearly transparent, whereas one with 100% opacity appears completely opaque.
In addition to overall opacity, which affects layer styles and blending modes applied to a layer, you can specify fill
opacity. Fill opacity affects only pixels, shapes, or text on a layer without affecting the opacity of layer effects such as
drop shadows.
Note: You cannot change the opacity of a background layer or a locked layer. To convert a background layer into a regular
layer that supports transparency, see
“Convert background and layers” on page 245.
1 In the Layers panel, select one or more layers or groups.
2 Change the Opacity and Fill values. (If you selected a group, only Opacity is available.)
To view all blending options, choose Blending Options from the Add A Layer Style icon at the bottom of the Layers
panel.
Specify a blending mode for a layer or group
A layer’s blending mode determines how its pixels blend with underlying pixels in the image. You can create a variety
of special effects using blending modes.
By default, the blending mode of a layer group is Pass Through, which means that the group has no blending properties
of its own. When you choose a different blending mode for a group, you effectively change the order in which the
image components are put together. All of the layers in the group are put together first. The composite group is then
treated as a single image and blended with the rest of the image using the selected blending mode. Thus, if you choose
a blending mode other than Pass Through for the group, none of the adjustment layers or layer blending modes inside
the group will apply to layers outside the group.
Note: There is no Clear blending mode for layers. For Lab images, the Color Dodge, Color Burn, Darken, Lighten,
Difference, Exclusion, Subtract, and Divide modes are unavailable. For HDR images, see
“Features that support 32-bpc
HDR images” on page 85.
1 Select a layer or group from the Layers panel.
2 Choose a blending mode:
• From the Layers panel, choose an option from the Blend Mode pop-up menu.
• Choose Layer > Layer Style > Blending Options, and then choose an option from the Blend Mode pop-up menu.