
Operation Manual


148
USING PHOTOSHOP
Color and tonal adjustments
Last updated 12/5/2011
Note: Use Legacy is automatically selected when editing Brightness/Contrast adjustment layers created with previous
versions of Photoshop.
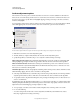
1 Do one of the following:
• Click the Brightness/Contrast icon in the Adjustments panel.
• Choose Layer > New Adjustment Layer > Brightness/Contrast. Click OK in the New Layer dialog box.
Note: You can also choose Image > Adjustments > Brightness/Contrast. But keep in mind that this method makes direct
adjustments to the image layer and discards image information.
2 In the Adjustments panel, drag the sliders to adjust the brightness and contrast.
Dragging to the left decreases the level, and dragging to the right increases it. The number at the right of each slider
reflects the brightness or contrast value. Values can range from -150 to +150 for Brightness, -50 to +100 for Contrast.
Adjust black and white points with the Auto option
The Auto option for Levels and Curves and the Auto Tone command automatically adjust the black point and white
point in an image. This clips a portion of the shadows and highlights in each channel and maps the lightest and darkest
pixels in each color channel to pure white (level 255) and pure black (level 0). The intermediate pixel values are
redistributed proportionately. As a result, using the Auto option or Auto Tone increases the contrast in an image
because the pixel values are expanded. Because the Auto option and Auto Tone adjust each color channel individually,
it may remove color or introduce color casts.
The Auto option and Auto Tone give good results in certain images with an average distribution of pixel values that
need a simple increase in contrast.
By default, the Auto option and the Auto Tone command clip the white and black pixels by 0.1%—that is, it ignores
the first 0.1% of either extreme when identifying the lightest and darkest pixels in the image. The default settings for
the Auto option can be changed in the Auto Color Correction Options dialog box.
1 Do one of the following:
• Click the Levels or Curves icon in the Adjustments panel.
• Choose Layer > New Adjustment Layer and choose either Levels or Curves. Click OK in the New Layer dialog box.
Note: You can choose Image > Auto Tone to apply the adjustment directly to the image layer. Keep in mind that this
method discards image information and is automatic. You cannot adjust any of the options in the following steps.
2 In the Adjustments panel, Alt-click (Windows) or Option-click (Mac OS) the Auto button.
3 Under Algorithms in the Auto Color Correction Options dialog box, select Enhance Per Channel Contrast.
4 Adjust the amount of shadow and highlight values that are clipped, and adjust the target color for the midtones.
5 Click OK to apply the Auto option settings.
More Help topics
“Set Auto adjustment options” on page 150
Apply the Auto Contrast adjustment
The Auto Contrast command adjusts image contrast automatically. Because Auto Contrast does not adjust channels
individually, it does not introduce or remove color casts. It clips the shadow and highlight values in an image and then
maps the remaining lightest and darkest pixels in the image to pure white (level 255) and pure black (level 0). This
makes the highlights appear lighter and shadows appear darker.