
Operation Manual

132
USING PHOTOSHOP
Color and tonal adjustments
Last updated 12/5/2011
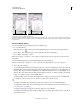
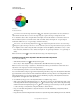
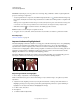
Adjust color saturation using Vibrance
Vibrance adjusts the saturation so that clipping is minimized as colors approach full saturation. This adjustment
increases the saturation of less-saturated colors more than the colors that are already saturated. Vibrance also prevents
skintones from becoming over saturated.
1 Do one of the following:
• In the Adjustments panel, click the Vibrance icon .
• Choose Layer > New Adjustment Layer > Vibrance. In the New Layer dialog box, type a name for the Vibrance
adjustment layer and click OK.
Note: You can also choose Image > Adjustments > Vibrance. But keep in mind that this method makes direct
adjustments to the image layer and discards image information.
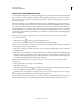
2 Do one of the following to adjust color saturation: Drag the Vibrance slider to increase or decrease color saturation
without clipping when colors become more saturated.
• To apply more adjustment to less saturated colors and prevent colors clipping as they reach total saturation, move
the Vibrance slider to the right.
• To apply the same amount of saturation adjustment to all colors regardless of their current saturation, move the
Saturation slider. In some situations, this may produce less banding than the Saturation slider in the
Hue/Saturation Adjustments panel or Hue/Saturation dialog box.
• To decrease saturation, move either the Vibrance or the Saturation slider to the left.
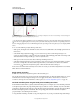
Convert a color image to black and white
The Black & White adjustment lets you convert a color image to grayscale while maintaining full control over how
individual colors are converted. You can also tint the grayscale by applying a color tone to the image, for example to
create a sepia effect. Black & White functions like the Channel Mixer, which also converts color images to
monochrome while allowing you to adjust color channel input.
For a video on converting color images to black & white, see www.adobe.com/go/vid0017.
1 Do one of the following:
• Click the Black & White icon or a Black & White preset in the Adjustments panel.
• Choose Layer > New Adjustment Layer > Black & White. In the New Layer dialog box, type a name for the
adjustment layer and then click OK.
Photoshop applies a default grayscale conversion.
Note: You can also choose Image > Adjustments > Black & White. But keep in mind that this method makes direct
adjustments to the image layer and discards image information.
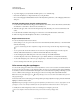
2 In the Adjustments panel, manually adjust the conversion using the color sliders, apply an Auto conversion, or
select a previously saved custom mix.
Preset menu Select a predefined grayscale mix or a previously saved mix. To save a mix, choose Save Black & White
Preset from the panel menu.
Auto Sets a grayscale mix based on the color values of the images, maximizing the distribution of gray values. The
Auto mix often produces excellent results, or can be used as the starting point for tweaking gray values using the color
sliders.