
Operation Manual

129
USING PHOTOSHOP
Color and tonal adjustments
Last updated 12/5/2011
2 Click the Levels or Curves icon in the Adjustments panel, or choose Layer > New Adjustment Layer, and then
choose Levels or Curves.
Note: You can also choose Image > Adjustments, and then choose Level or Curves. You would complete the following
steps in either the Level or Curves dialog box. But keep in mind that this method makes direct adjustments to the image
layer and discards image information.
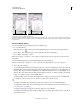
3 In the Adjustments panel, double-click the Set Gray Point tool . In the Adobe Color Picker, verify that the
currently selected color has identical R, G, and B values (for example, 128,128,128).
4 With the Set Gray Point Eyedropper, click the neutral area that you identified in Step 1. This should reset midtones
and remove the color cast from the image.
5 If necessary, make final adjustments in the Adjustments panel.
If you specified new target colors for an eyedropper, Photoshop asks whether you want to save the new target colors
as defaults.
Adjust hue and saturation
Hue/Saturation lets you adjust the hue, saturation, and lightness of a specific range of colors in an image or
simultaneously adjust all the colors in an image. This adjustment is especially good for fine-tuning colors in a CMYK
image so that they are in the gamut of an output device.
You can save Hue/Saturation settings in the Adjustments panel and load them for reuse in other images. For more
information, see
“Save adjustment settings” on page 119 and “Reapply adjustment settings” on page 120.
Apply Hue/Saturation adjustment
1 Do one of the following:
• Click the Hue/Saturation icon or a Hue/Saturation preset in the Adjustments panel.
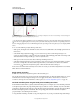
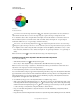
• Choose Layer > New Adjustment Layer > Hue/Saturation. Click OK in the New Layer dialog box. The two color
bars in the dialog box represent the colors in their order on the color wheel. The upper color bar shows the color
before the adjustment; the lower bar shows how the adjustment affects all of the hues at full saturation.
Note: You can also choose Image > Adjustments > Hue/Saturation. But keep in mind that this method makes direct
adjustments to the image layer and discards image information.
2 In the Adjustments panel, choose which colors to adjust using the Edit pop-up menu:
• Choose Master to adjust all colors at once.
• Choose one of the other preset color ranges listed for the color you want to adjust. To modify the color range, see
“Adjust hue and saturation” on page 129.
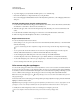
3 For Hue, enter a value or drag the slider until you are satisfied with the colors.
The values displayed in the box reflect the number of degrees of rotation around the wheel from the original color of
the pixel. A positive value indicates clockwise rotation; a negative value, counterclockwise rotation. Values can range
from -180 to +180.