
Operation Manual

128
USING PHOTOSHOP
Color and tonal adjustments
Last updated 12/5/2011
2 To preview clipping as you adjust black and white points, do one of the following:
• Hold down Alt (Windows) or Option (Mac OS) as you drag the sliders.
• Choose Show Clipping For Black/White Points from the Adjustments panel menu, or Show Clipping in the Curves
dialog box.
Set black and white points using the eyedropper tools
1 Double-click the Set Black Point Eyedropper tool. In the Adobe Color Picker, select a value where R, G, and B values
are identical. To set the value to black, set R, G, and B values to 0.
2 With the eyedropper, click on an area in the image that represents the black point, or the area with lowest tonal
values.
3 Double-click the Set White Point Eyedropper tool and select a color with identical R, G, and B values.
4 Click in an image area with the lightest tonal values to set the white point.
Keyboard shortcuts: Curves
You can use these keyboard shortcuts for Curves:
• (Curves dialog box) To set a point on the curve for the current channel, Ctrl-click (Windows) or Command-click
(Mac
OS) in the image.
If you’re instead using the Curves adjustment, simply click in the image with the On-image adjustment tool .
• To set a point on the curve for the selected color in each color component channel (but not in the composite
channel), Shift+Ctrl-click (Windows) or Shift+Command-click (Mac
OS) in the image.
• To select multiple points, Shift-click points on the curve. Selected points are filled with black.
• To deselect all points on the curve, click in the grid, or press Ctrl-D (Windows) or Command-D (Mac OS).
• To select the next higher point on the curve, press the plus key; to select the next lowest, press the minus key.
• To move selected points on the curve, press the arrow keys.
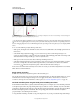
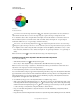
Color correct using the eyedroppers
You can use the eyedroppers in the Levels or Curves adjustment to correct a color cast such as an unwanted tint from
an excess of color (red, green, blue, or cyan, magenta, yellow). It’s easier to color-balance an image by first identifying
an area that you want to be neutral and then removing the color cast from that area. Depending on the image, you can
use one or all three of the eyedroppers. The eyedroppers work best on an image with easily identified neutrals.
Note: The Set Gray Point Eyedropper tool is used primarily for color correction and is unavailable when you work
with grayscale images.
For the best results, don’t use the eyedroppers in images that require a large adjustment to map a pixel to the maximum
highlight or minimum shadow values.
Important: Using the eyedroppers undoes any previous adjustment you made in Levels or Curves. If you plan to use the
eyedroppers, it’s best to use them first and then fine-tune your adjustments with the Levels sliders or Curves points.
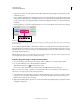
1 Identify an area in the image that you want to be neutral gray. For example, a paved road.
Use a color sampler to mark a neutral area so that you can click it with an eyedropper later.