
Operation Manual

58
USING ILLUSTRATOR
Drawing
Last updated 11/8/2011
2 Do one of the following:
• Drag diagonally until the ellipse is the desired size.
• Click where you want the top-left corner of the ellipse’s bounding box to be. Specify a width and height for the
ellipse, and click
OK.
Note: To create a circle, hold down the Shift key while dragging, or if you are specifying dimensions, once you’ve
entered a Width value you can click on the word Height to copy that value into the Height box.
For a video on using shape tools, see www.adobe.com/go/vid0036.
More Help topics
“Drawing tool gallery” on page 19
“Keys for drawing” on page 479
“Tools panel overview” on page 16
Draw polygons
1 Select the Polygon tool .
2 Do one of the following:
• Drag until the polygon is the desired size. Drag the pointer in an arc to rotate the polygon. Press the Up Arrow
and Down Arrow keys to add and remove sides from the polygon.
• Click where you want the center of the polygon to be. Specify a radius and number of sides for the polygon, and
click
OK.
Triangles are polygons too! You can draw one just as you would any other polygon.
For a video on using shape tools, see www.adobe.com/go/vid0036.
More Help topics
“Drawing tool gallery” on page 19
“Keys for drawing” on page 479
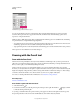
Draw stars
1 Select the Star tool .
2 Do one of the following:
• Drag until the star is the desired size. Drag the pointer in an arc to rotate the star. Press the Up Arrow and Down
Arrow to add and remove points from the star.
• Click where you want the center of the star to be. For Radius 1, specify the distance from the center of the star
to the star’s innermost points. For Radius 2, specify the distance from the center of the star to the star’s
outermost points. For Points, specify how many points you want the star to have. Then click
OK. To increase or
decrease the number of points in the star, you can also use the up and down arrow keys while drawing the star.
For a video on using shape tools, see www.adobe.com/go/vid0036.