
Operation Manual

373
USING ILLUSTRATOR
Creating special effects
Last updated 11/8/2011
More Help topics
“About linked and embedded artwork” on page 270
“About plug-in modules” on page 50
Improving performance for effects
Some effects are very memory-intensive. The following techniques can help improve performance when applying
these effects:
• Select the Preview option in effect dialog boxes to save time and prevent unintended results.
• Change the settings. Some commands, such as Glass, are extremely memory-intensive. Try different settings to
increase their speed.
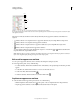
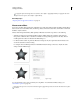
• If you plan to print to a grayscale printer, convert a copy of the bitmap image to grayscale before applying effects.
Note, however, that in some cases, applying an effect to a color bitmap image and then converting it to grayscale
may not have the same result as applying the same effect directly to a grayscale version of the image.
Modify or delete an effect
You modify or delete an effect by using the Appearance panel.
1 Select the object or group (or target the layer in the Layers panel) that uses the effect.
2 Do one of the following:
• To modify the effect, click its blue underlined name in the Appearance panel. In the effect’s dialog box, make
the desired alterations, and then click
OK.
• To delete the effect, select the effect listing in the Appearance panel, and click the Delete button.
Summary of effects
Effects quick reference
Effect Action
Effect > 3D Convert open or closed paths, or bitmap objects, into three-dimensional (3D) objects, which you can rotate,
light, and shade.
See also: “Create 3D objects” on page 262
Effect > Artistic Simulate a painterly appearance on traditional media.
See also: “Artistic effects” on page 375
Effect > Blur Retouch images and smooth transitions by averaging the pixels next to the hard edges of defined lines and
shaded areas in an image.
See also: “Blur effects” on page 376
Effect > Brush Strokes Create a painterly or fine-arts look using different brush- and ink- stroke effects.
See also: “Brush Strokes effects” on page 376
Effect > Convert To Shape Reshape either a vector or a bitmap object.
See also: “Reshaping objects with effects” on page 257