
Operation Manual

310
USING ILLUSTRATOR
Type
Last updated 11/8/2011
Resize a text area
You can resize text in different ways, depending on the whether you are creating point type, area type, or text along a
path.
There is no limit for the amount of text that can be written using point type, so resizing of the text box is not required
in this case.
When using the area type tool, you drag an object and type inside the selected area. In this case, the text resizes when
you resize the object using the Direct Selection tool.
When you type text along a path, you can thread text between objects (see “Threading text between objects” on
page 312), if the text does not fit in the selected path. In this case also, the text is resized if you resize the path using the
Direct Selection tool.
Make sure that the bounding box setting is set to Show Bounding Box. If you are not able to see the bounding box,
then click View > Show Bounding Box.
❖ To resize, do one of the following:
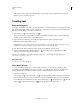
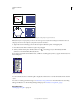
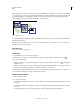
• Select the type object using the Selection tool or Layers panel, and drag a handle on the bounding box.
Resizing a text area with the Selection tool
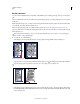
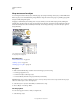
• Select the edge or corner of the type path with the Direct Selection tool . Then drag to adjust the shape of the path.
Adjusting the type path using the Direct Selection tool is easiest when you’re in Outline view.
Resizing a type area with the Direct Selection tool
• Select the type object using the Selection tool or Layers panel, and choose Type > Area Type Options. Enter values
for Width and Height, and click
OK. If the text area is not a rectangle, these values determine the dimensions of the
object’s bounding box.