
Operation Manual


174
USING ILLUSTRATOR
Painting
Last updated 11/8/2011
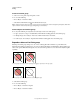
Convert brush strokes to outlines
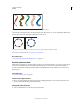
You can convert brush strokes into outlined paths to edit the individual components of a brushed path.
1 Select a brushed path.
2 Choose Object > Expand Appearance.
Illustrator places the components of the expanded path in a group. Within the group are a path and a subgroup
containing the brush stoke outlines.
Create or modify brushes
You can create and customize calligraphic, scatter, art, pattern, and bristle brushes depending on your requirement.
For scatter, art, and pattern brushes, you must first create the artwork.
Follow these guidelines when creating artwork for brushes:
• The artwork cannot contain gradients, blends, other brush strokes, mesh objects, bitmap images, graphs, placed
files, or masks.
• For art and pattern brushes, the artwork cannot contain type. To achieve a brush-stroke effect with type, create an
outline of the type and then create a brush with the outline.
• For pattern brushes, create up to five pattern tiles (depending on the brush configuration), and add the tiles to the
Swatches panel.
Note: You can make the brushes you create available for every new document by adding the brush definition to the New
Document Profile. For more information on new document profiles, see
“About new document profiles” on page 27
More Help topics
“About patterns” on page 197
“Create corner tiles for brush patterns” on page 201
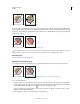
Create a brush
1 For scatter and art brushes, select the artwork you want to use. For pattern brushes, you can select the artwork for
the side tile, but it isn’t necessary. For detailed guidelines to create pattern brushes, see
“Guidelines for constructing
pattern tiles” on page 197. To know more about pattern brush options, see “Pattern brush options” on page 178.
Note: If you do not want to see a seam between the artwork pieces used to create the pattern brush, turn off the Anti-
Aliasing option from Edit > Preferences > General (Windows) or Illustrator > General > Preferences (Mac OS).
2 Click the New Brush button in the Brushes panel. Alternatively, drag the selected artwork to the Brushes panel.
3 Select the type of brush you want to create, and click OK.
4 In the Brush Options dialog box, enter a name for the brush, set brush options, and click OK.
Modify a brush
• To change the options for a brush, double-click the brush in the Brushes panel. Set the brush options and click OK.
If the current document contains brushed paths that use the modified brush, a message appears. Click Apply To
Strokes to change pre-existing strokes. Click Leave Strokes to leave pre-existing strokes unchanged, and apply the
modified brush to new strokes only.
• To change the artwork used by a scatter, art, or pattern brush, drag the brush into your artwork and make the
changes you want. Then Alt-drag (Windows) or Option-drag (Mac OS) the modified brush onto the original brush
in the Brushes panel.