
Operation Manual


Preview
options
Working with Graphics 21
Tip: Batch-process bitmap images or
sketches using the Live Trace command
in Bridge.
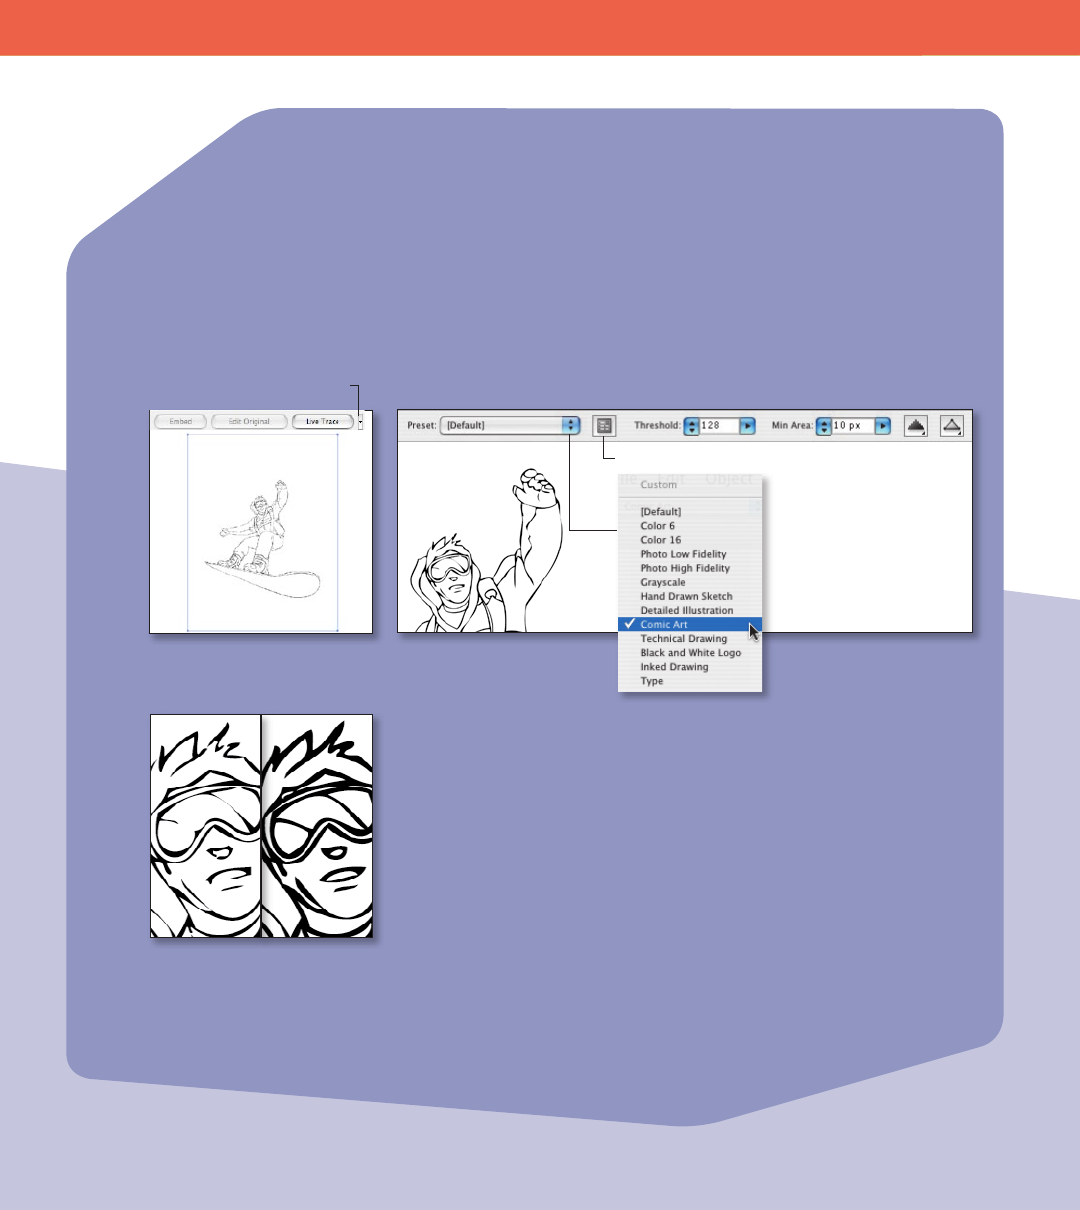
Live Trace automatically turns placed images into beautifully detailed vector graphics
that are easy to edit, resize, and manipulate.
To use Live Trace:
Step 1: Select a placed bitmap image, and click the Live Trace button in the Control
panel to create a Live Trace object.
Step 2: See the results in the workspace, and, if desired, adjust your settings in the
Control panel. For example, select a preset for a dierent type of image, and choose
the type of raster or vector preview you want to see. Click the Tracing Presets and
Options button to access more advanced tracing options.
Adjust the threshold to ne-
tune the contrast of the traced
image.
Tip: For more on Live Trace, see
Creating Vector Content Using Live Trace
on the Adobe website (www.adobe.
com/products/illustrator/pdfs/creating_
vector_content.pdf).
Step 3: When tracing black-and-white images, adjust the Threshold setting in the
Control panel. Illustrator converts pixels lighter than the Threshold value to white and
pixels darker than the Threshold value to black.
Note: After you trace a bitmap image, you may nd details that you’d like to remove.
Use the Edit Original command in the Links panel to open the image in Photoshop
where, for instance, you can remove a border or extraneous detail. Save your changes,
and Live Trace automatically retraces the placed image.
Tracing Presets and Options
Choose a tracing preset.
Create a Live Trace object.
Live Trace
Tracing Options Dialog