
Operation Manual

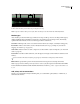

Table Of Contents
- Contents
- Chapter 1: Getting started
- Chapter 2: Digital audio fundamentals
- Chapter 3: Workflow and workspace
- Chapter 4: Setting up Adobe Audition
- Chapter 5: Importing, recording, and playing audio
- Chapter 6: Editing audio files
- Displaying audio in Edit View
- Selecting audio
- Copying, cutting, pasting, and deleting audio
- Visually fading and changing amplitude
- Working with markers
- Creating and deleting silence
- Inverting and reversing audio
- Generating audio
- Analyzing phase, frequency, and amplitude
- Converting sample types
- Recovery and undo
- Chapter 7: Applying effects
- Chapter 8: Effects reference
- Amplitude and compression effects
- Delay and echo effects
- Filter and equalizer effects
- Modulation effects
- Restoration effects
- Reverb effects
- Special effects
- Stereo imagery effects
- Changing stereo imagery
- Binaural Auto-Panner effect (Edit View only)
- Center Channel Extractor effect
- Channel Mixer effect
- Doppler Shifter effect (Edit View only)
- Graphic Panner effect
- Pan/Expand effect (Edit View only)
- Stereo Expander effect
- Stereo Field Rotate VST effect
- Stereo Field Rotate process effect (Edit View only)
- Time and pitch manipulation effects
- Multitrack effects
- Chapter 9: Mixing multitrack sessions
- Chapter 10: Composing with MIDI
- Chapter 11: Loops
- Chapter 12: Working with video
- Chapter 13: Creating surround sound
- Chapter 14: Saving and exporting
- Saving and exporting files
- Audio file formats
- About audio file formats
- 64-bit doubles (RAW) (.dbl)
- 8-bit signed (.sam)
- A/mu-Law Wave (.wav)
- ACM Waveform (.wav)
- Amiga IFF-8SVX (.iff, .svx)
- Apple AIFF (.aif, .snd)
- ASCII Text Data (.txt)
- Audition Loop (.cel)
- Creative Sound Blaster (.voc)
- Dialogic ADPCM (.vox)
- DiamondWare Digitized (.dwd)
- DVI/IMA ADPCM (.wav)
- Microsoft ADPCM (.wav)
- mp3PRO (.mp3)
- NeXT/Sun (.au, .snd)
- Ogg Vorbis (.ogg)
- SampleVision (.smp)
- Spectral Bitmap Image (.bmp)
- Windows Media Audio (.wma)
- Windows PCM (.wav, .bwf)
- PCM Raw Data (.pcm, .raw)
- Video file formats
- Adding file information
- Chapter 15: Automating tasks
- Chapter 16: Building audio CDs
- Chapter 17: Keyboard shortcuts
- Chapter 18: Digital audio glossary
- Index
ADOBE AUDITION 3.0
User Guide
76
Snap to markers, rulers, frames, and zero crossings
Snapping causes selection boundaries, as well as the start-time indicator, to move to items such as markers, ruler
ticks, zero-crossing points, and frames. Enabling snapping helps you make accurate selections; however, if you prefer,
you can disable snapping for specific items.
❖ To enable or disable snapping, choose Edit > Snapping, and choose any of the following commands:
Snap To Markers Snaps to a marker point. For information on defining markers, see “About markers” on page 80.
Snap To Ruler (Coarse) Snaps only to the major numeric divisions (decimal, SMPTE, samples, and so on) in the
timeline.
Note: You can enable only one Snap To Ruler command at a time.
Snap To Ruler (Fine) Snaps to each of the subdivisions (decimal, SMPTE, samples, and so on) within the timeline.
Zooming in (by right-clicking as you drag across the timeline) breaks the display down into more accurate subdivi-
sions, letting you place the cursor more accurately within the timeline.
Snap To Zero Crossings Snaps to the nearest place where audio crosses the center line (the zero amplitude point).
Snap To Frames (Always) Snaps to a frame boundary if the time format is measured in frames (such as Compact Disc
and SMPTE). This command is especially handy for working on audio for CD.
You can access snapping commands by right-clicking the timeline.
See also
“Snap to clip and loop endpoints” on page 193
Copying, cutting, pasting, and deleting audio
Choose a clipboard
Adobe Audition gives you access to five internal clipboards for temporary data storage. Each works similarly to the
Windows clipboard, except that they can handle more data at a faster rate.
❖ Choose Edit > Set Current Clipboard, and choose a clipboard.
Choose the Windows clipboard if you want to copy audio data to other Windows applications.
Copy or cut audio data
1 In Waveform Display of Edit View, select the audio data you want to copy or cut. Or, to copy or cut the entire
waveform, deselect all audio data.
2 Choose one of the following:
• Edit > Copy, to copy audio data to the active clipboard.
• Edit > Copy To New, to copy and paste the audio data into a newly created file in one step.
• Edit > Cut, to remove audio data from the current waveform and copy it to the active clipboard.