
Operation Manual
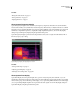
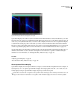
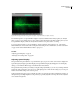
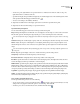
Table Of Contents
- Contents
- Chapter 1: Getting started
- Chapter 2: Digital audio fundamentals
- Chapter 3: Workflow and workspace
- Chapter 4: Setting up Adobe Audition
- Chapter 5: Importing, recording, and playing audio
- Chapter 6: Editing audio files
- Displaying audio in Edit View
- Selecting audio
- Copying, cutting, pasting, and deleting audio
- Visually fading and changing amplitude
- Working with markers
- Creating and deleting silence
- Inverting and reversing audio
- Generating audio
- Analyzing phase, frequency, and amplitude
- Converting sample types
- Recovery and undo
- Chapter 7: Applying effects
- Chapter 8: Effects reference
- Amplitude and compression effects
- Delay and echo effects
- Filter and equalizer effects
- Modulation effects
- Restoration effects
- Reverb effects
- Special effects
- Stereo imagery effects
- Changing stereo imagery
- Binaural Auto-Panner effect (Edit View only)
- Center Channel Extractor effect
- Channel Mixer effect
- Doppler Shifter effect (Edit View only)
- Graphic Panner effect
- Pan/Expand effect (Edit View only)
- Stereo Expander effect
- Stereo Field Rotate VST effect
- Stereo Field Rotate process effect (Edit View only)
- Time and pitch manipulation effects
- Multitrack effects
- Chapter 9: Mixing multitrack sessions
- Chapter 10: Composing with MIDI
- Chapter 11: Loops
- Chapter 12: Working with video
- Chapter 13: Creating surround sound
- Chapter 14: Saving and exporting
- Saving and exporting files
- Audio file formats
- About audio file formats
- 64-bit doubles (RAW) (.dbl)
- 8-bit signed (.sam)
- A/mu-Law Wave (.wav)
- ACM Waveform (.wav)
- Amiga IFF-8SVX (.iff, .svx)
- Apple AIFF (.aif, .snd)
- ASCII Text Data (.txt)
- Audition Loop (.cel)
- Creative Sound Blaster (.voc)
- Dialogic ADPCM (.vox)
- DiamondWare Digitized (.dwd)
- DVI/IMA ADPCM (.wav)
- Microsoft ADPCM (.wav)
- mp3PRO (.mp3)
- NeXT/Sun (.au, .snd)
- Ogg Vorbis (.ogg)
- SampleVision (.smp)
- Spectral Bitmap Image (.bmp)
- Windows Media Audio (.wma)
- Windows PCM (.wav, .bwf)
- PCM Raw Data (.pcm, .raw)
- Video file formats
- Adding file information
- Chapter 15: Automating tasks
- Chapter 16: Building audio CDs
- Chapter 17: Keyboard shortcuts
- Chapter 18: Digital audio glossary
- Index
ADOBE AUDITION 3.0
User Guide
66
See also
“Change the vertical scale” on page 71
“Colors preferences” on page 35
“Display preferences” on page 36
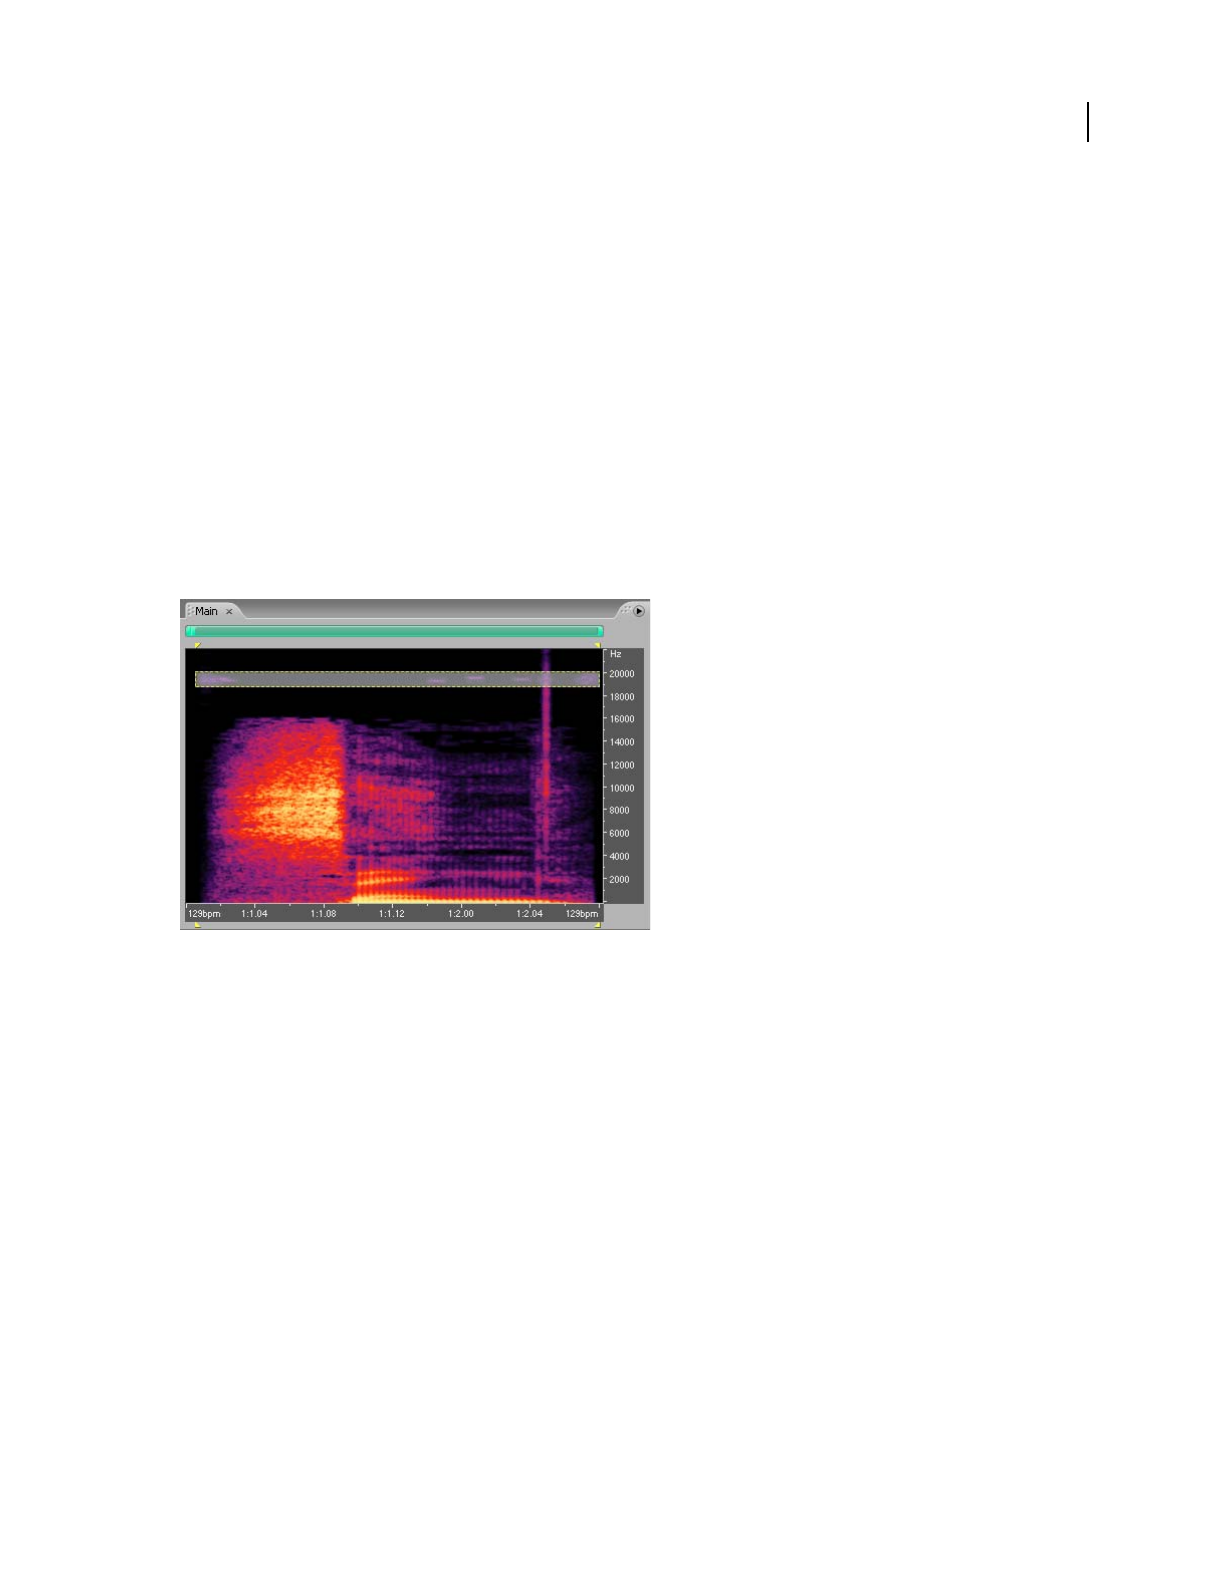
About Spectral Frequency Display
Spectral Frequency Display shows a waveform by its frequency components, where the x-axis (horizontal ruler)
measures time and the y-axis (vertical ruler) measures frequency. This view lets you analyze audio data to see which
frequencies are most prevalent. Brighter colors represent greater amplitude components. Default colors range from
dark blue (low-amplitude frequencies) to bright yellow (high-amplitude frequencies). You can modify display
settings for Spectral Frequency Display using the Spectral Controls panel.
Spectral Frequency Display is perfect for removing unwanted sounds, such as coughs and other artifacts. This is
known as frequency-space editing.
Spectral Frequency Display, with high frequencies selected
See also
“Select spectral ranges” on page 73
“Adjusting spectral displays” on page 68
“Techniques for restoring audio” on page 141
About Spectral Pan Display
Spectral Pan Display shows the pan (left-right stereo) position of every frequency in an audio file, so you can
visualize the sound locations in the stereo plane. The x-axis (horizontal ruler) measures time and the y-axis (vertical
ruler) measures pan position, with the top of the display (-100%) representing full left and the bottom of the display
(100%) representing full right. Brighter colors represent louder audio signals. You can modify display settings for
Spectral Pan Display using the Spectral Controls panel.