
Operation Manual
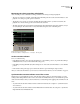
Table Of Contents
- Contents
- Chapter 1: Getting started
- Chapter 2: Digital audio fundamentals
- Chapter 3: Workflow and workspace
- Chapter 4: Setting up Adobe Audition
- Chapter 5: Importing, recording, and playing audio
- Chapter 6: Editing audio files
- Displaying audio in Edit View
- Selecting audio
- Copying, cutting, pasting, and deleting audio
- Visually fading and changing amplitude
- Working with markers
- Creating and deleting silence
- Inverting and reversing audio
- Generating audio
- Analyzing phase, frequency, and amplitude
- Converting sample types
- Recovery and undo
- Chapter 7: Applying effects
- Chapter 8: Effects reference
- Amplitude and compression effects
- Delay and echo effects
- Filter and equalizer effects
- Modulation effects
- Restoration effects
- Reverb effects
- Special effects
- Stereo imagery effects
- Changing stereo imagery
- Binaural Auto-Panner effect (Edit View only)
- Center Channel Extractor effect
- Channel Mixer effect
- Doppler Shifter effect (Edit View only)
- Graphic Panner effect
- Pan/Expand effect (Edit View only)
- Stereo Expander effect
- Stereo Field Rotate VST effect
- Stereo Field Rotate process effect (Edit View only)
- Time and pitch manipulation effects
- Multitrack effects
- Chapter 9: Mixing multitrack sessions
- Chapter 10: Composing with MIDI
- Chapter 11: Loops
- Chapter 12: Working with video
- Chapter 13: Creating surround sound
- Chapter 14: Saving and exporting
- Saving and exporting files
- Audio file formats
- About audio file formats
- 64-bit doubles (RAW) (.dbl)
- 8-bit signed (.sam)
- A/mu-Law Wave (.wav)
- ACM Waveform (.wav)
- Amiga IFF-8SVX (.iff, .svx)
- Apple AIFF (.aif, .snd)
- ASCII Text Data (.txt)
- Audition Loop (.cel)
- Creative Sound Blaster (.voc)
- Dialogic ADPCM (.vox)
- DiamondWare Digitized (.dwd)
- DVI/IMA ADPCM (.wav)
- Microsoft ADPCM (.wav)
- mp3PRO (.mp3)
- NeXT/Sun (.au, .snd)
- Ogg Vorbis (.ogg)
- SampleVision (.smp)
- Spectral Bitmap Image (.bmp)
- Windows Media Audio (.wma)
- Windows PCM (.wav, .bwf)
- PCM Raw Data (.pcm, .raw)
- Video file formats
- Adding file information
- Chapter 15: Automating tasks
- Chapter 16: Building audio CDs
- Chapter 17: Keyboard shortcuts
- Chapter 18: Digital audio glossary
- Index

ADOBE AUDITION 3.0
User Guide
52
4 In the Parse Song Title and Filename Template boxes, specify the information you want to include in the title and
filename. Symbols correspond to information such as Artist (%a), Song Title (%s), Year (%y), and so on.
5 To capitalize first letters in words and trim spaces at the beginning and end of track titles, select the corresponding
options.
6 Click OK.
Set Device Interface options
1
In the Extract Audio From CD dialog box, select Generic Win32 or ASPI/SPTI. In most cases, ASPI/SPTI is the
best choice. Select Generic Win32 only if the ASPI/SPTI option doesn’t produce satisfactory results. (The Generic
Win32 option uses Input/Output control codes instead of SCSI commands.)
If you select ASPI/SPTI, set the following options:
Read Method Determines how Adobe Audition reads CD audio. Several methods are provided, many of them
developed before the SCSI 3 specifications were published. (The SCSI 2 specs don’t accommodate CD ripping.)
• MMC – Read CD A SCSI 3-specific setting that works with most newer drives. If you have a newer CD-ROM drive,
try this setting first.
• SBC – Read(10) A standard SCSI read setting that uses a 10-byte SRB (SCSI Request Block). All SCSI devices are
required to support this setting.
• SBC – Read(6) A standard SCSI read setting that uses a 6-byte SRB (SCSI Request Block). Many SCSI devices
support this setting, but because it’s optional, not all do.
• Plextor (D8) Sends the D8 SCSI Op Code to the CD-ROM drive. Use this setting with older Plextor CD-ROM
drives.
• NEC (D4) Works with older NEC CD-ROM drives.
CD Speed Lists all extraction speeds that the selected CD-ROM drive supports and lets you specify the speed you
want to use. The Max (Maximum) Speed option usually produces satisfactory results, but if it produces errors,
specify a slower speed.
Buffer Size Specifies how much data Adobe Audition calls into the CD Extraction module to fetch, therefore deter-
mining how much data is pulled from the CD in each call to the read command. The default is 16 KB, but you can
experiment with other sizes (which range all the way to the highest buffer size the CD-ROM drive supports).
Although higher sizes mean faster ripping, they could introduce errors into the ripped file.
Swap Byte Order Changes the byte order from Little Endian to Big Endian, or vice versa. Some CD-ROM drives
designed to work only with other types of computers (like DEC and Macintosh® systems) report data by using the
Little Endian byte order, while PCs use the Big Endian method. Normally, you should leave this option deselected;
select it only if the extraction process seems to work fine but the audio results contain only digital noise.
Swap Channels Places the left channel of CD audio in the right channel of the Main panel, and places the right
channel of CD audio in the left channel of the panel.
Spin Up Before Extraction Causes the CD-ROM drive to start spinning before Adobe Audition extracts the data.
Some CD-ROM drives have better accuracy if they first read the CD after the drive is spinning. Selecting this option
for other drives, however, doesn’t provide any advantage.
2 For Error Correction, CDDA Accurate is automatically selected if the CD-ROM drive has built-in ripping error
correction. If your drive isn’t CDDA Accurate, select either No Correction or Jitter Correction. (The latter compen-
sates for data reading problems that older drives might have.)