
Operation Manual
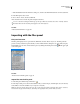
Table Of Contents
- Contents
- Chapter 1: Getting started
- Chapter 2: Digital audio fundamentals
- Chapter 3: Workflow and workspace
- Chapter 4: Setting up Adobe Audition
- Chapter 5: Importing, recording, and playing audio
- Chapter 6: Editing audio files
- Displaying audio in Edit View
- Selecting audio
- Copying, cutting, pasting, and deleting audio
- Visually fading and changing amplitude
- Working with markers
- Creating and deleting silence
- Inverting and reversing audio
- Generating audio
- Analyzing phase, frequency, and amplitude
- Converting sample types
- Recovery and undo
- Chapter 7: Applying effects
- Chapter 8: Effects reference
- Amplitude and compression effects
- Delay and echo effects
- Filter and equalizer effects
- Modulation effects
- Restoration effects
- Reverb effects
- Special effects
- Stereo imagery effects
- Changing stereo imagery
- Binaural Auto-Panner effect (Edit View only)
- Center Channel Extractor effect
- Channel Mixer effect
- Doppler Shifter effect (Edit View only)
- Graphic Panner effect
- Pan/Expand effect (Edit View only)
- Stereo Expander effect
- Stereo Field Rotate VST effect
- Stereo Field Rotate process effect (Edit View only)
- Time and pitch manipulation effects
- Multitrack effects
- Chapter 9: Mixing multitrack sessions
- Chapter 10: Composing with MIDI
- Chapter 11: Loops
- Chapter 12: Working with video
- Chapter 13: Creating surround sound
- Chapter 14: Saving and exporting
- Saving and exporting files
- Audio file formats
- About audio file formats
- 64-bit doubles (RAW) (.dbl)
- 8-bit signed (.sam)
- A/mu-Law Wave (.wav)
- ACM Waveform (.wav)
- Amiga IFF-8SVX (.iff, .svx)
- Apple AIFF (.aif, .snd)
- ASCII Text Data (.txt)
- Audition Loop (.cel)
- Creative Sound Blaster (.voc)
- Dialogic ADPCM (.vox)
- DiamondWare Digitized (.dwd)
- DVI/IMA ADPCM (.wav)
- Microsoft ADPCM (.wav)
- mp3PRO (.mp3)
- NeXT/Sun (.au, .snd)
- Ogg Vorbis (.ogg)
- SampleVision (.smp)
- Spectral Bitmap Image (.bmp)
- Windows Media Audio (.wma)
- Windows PCM (.wav, .bwf)
- PCM Raw Data (.pcm, .raw)
- Video file formats
- Adding file information
- Chapter 15: Automating tasks
- Chapter 16: Building audio CDs
- Chapter 17: Keyboard shortcuts
- Chapter 18: Digital audio glossary
- Index

ADOBE AUDITION 3.0
User Guide
51
Extract CD tracks with the Open command
1 Place an audio CD in the computer’s CD-ROM drive.
2 In Edit View, choose File > Open.
3 Choose CD Digital Audio (*.cda) as the file type, and navigate to the CD-ROM drive.
4 Select the tracks you want to rip, and click Open.
Extract CD tracks with the Extract Audio From CD command
1 Place an audio CD in the computer’s CD-ROM drive.
2 In Edit View or CD View, choose File > Extract Audio From CD.
3 Under Device Interface Options, choose the drive that contains the audio CD. If necessary, set remaining interface
options.
4 For Selection, do one of the following:
• Select Absolute Block Selection to extract part of a track or a segment of audio that spans multiple tracks. In the
Start box, enter the beginning frame. In the Length box, enter the total number of frames you wish to extract.
(Each second of CD audio has 75 frames.) The resulting start and length times appear in Min:Sec:Frame format
to the left of their respective boxes. The range bar provides a graphical representation of how much audio will be
extracted and where the audio appears within the CD.
TheoptionaboveisgreatforpullinghiddentracksfromCDs,orforjoiningtracksthathavebeenbrokenupbytrack
indexes (such as live performances).
• Select Track to extract one or more complete CD tracks. A list of all tracks on the CD appears, along with their
lengths stated in Min:Sec:Frame format. Select the desired tracks, and then set any of the following options:
Extract To Single Waveform Creates one audio file from all selected tracks.
Artist, Album, Genre, Year Adds track information you either manually enter or acquire automatically from a CD
database.
To rename a track, double-click it.
Get Titles Acquires track information from a CD database you specify by clicking Configure.
Clear Removes all existing track information.
Configure Opens the Configure Titles dialog box, where you specify an online CD database and determine title
format.
5 To listen to the selected tracks before extracting them, click Preview.
6 To save the settings for future use, save a preset. (See “Use effect presets” on page 104.)
7 After you finish setting options, click OK.
Configure track information from a CD database
1
In the Extract Audio From CD dialog box, click Configure.
2 In the HTTP Titles Database box, enter the domain name or IP address for your favorite CD database.
3 Enter your e-mail address. (Adobe Audition doesn’t use this information, but many CD databases require it.)