Operation Manual
Table Of Contents
- Contents
- Chapter 1: Getting started
- Chapter 2: Digital audio fundamentals
- Chapter 3: Workflow and workspace
- Chapter 4: Setting up Adobe Audition
- Chapter 5: Importing, recording, and playing audio
- Chapter 6: Editing audio files
- Displaying audio in Edit View
- Selecting audio
- Copying, cutting, pasting, and deleting audio
- Visually fading and changing amplitude
- Working with markers
- Creating and deleting silence
- Inverting and reversing audio
- Generating audio
- Analyzing phase, frequency, and amplitude
- Converting sample types
- Recovery and undo
- Chapter 7: Applying effects
- Chapter 8: Effects reference
- Amplitude and compression effects
- Delay and echo effects
- Filter and equalizer effects
- Modulation effects
- Restoration effects
- Reverb effects
- Special effects
- Stereo imagery effects
- Changing stereo imagery
- Binaural Auto-Panner effect (Edit View only)
- Center Channel Extractor effect
- Channel Mixer effect
- Doppler Shifter effect (Edit View only)
- Graphic Panner effect
- Pan/Expand effect (Edit View only)
- Stereo Expander effect
- Stereo Field Rotate VST effect
- Stereo Field Rotate process effect (Edit View only)
- Time and pitch manipulation effects
- Multitrack effects
- Chapter 9: Mixing multitrack sessions
- Chapter 10: Composing with MIDI
- Chapter 11: Loops
- Chapter 12: Working with video
- Chapter 13: Creating surround sound
- Chapter 14: Saving and exporting
- Saving and exporting files
- Audio file formats
- About audio file formats
- 64-bit doubles (RAW) (.dbl)
- 8-bit signed (.sam)
- A/mu-Law Wave (.wav)
- ACM Waveform (.wav)
- Amiga IFF-8SVX (.iff, .svx)
- Apple AIFF (.aif, .snd)
- ASCII Text Data (.txt)
- Audition Loop (.cel)
- Creative Sound Blaster (.voc)
- Dialogic ADPCM (.vox)
- DiamondWare Digitized (.dwd)
- DVI/IMA ADPCM (.wav)
- Microsoft ADPCM (.wav)
- mp3PRO (.mp3)
- NeXT/Sun (.au, .snd)
- Ogg Vorbis (.ogg)
- SampleVision (.smp)
- Spectral Bitmap Image (.bmp)
- Windows Media Audio (.wma)
- Windows PCM (.wav, .bwf)
- PCM Raw Data (.pcm, .raw)
- Video file formats
- Adding file information
- Chapter 15: Automating tasks
- Chapter 16: Building audio CDs
- Chapter 17: Keyboard shortcuts
- Chapter 18: Digital audio glossary
- Index

ADOBE AUDITION 3.0
User Guide
44
3 (Optional) To preview the contents of a selected audio file, click Play to listen to the file once, select Loop to repeat
the file until you click Stop, or select Auto Play to play files automatically when you select them.
4 Click Open.
See also
“About audio file formats” on page 244
“About video file formats” on page 252
Append one or more audio files to another
1 In Edit View, open the audio file that you want to add on to.
2 Choose File > Open Append.
3 IntheOpenAppenddialogbox,selectoneormorefiles.(Toselectmultiple,adjacentfiles,clickthefirstfileand
then Shift-click the last. To select multiple, nonadjacent files, Ctrl-click them.)
Note: If the selected audio files have a different sample rate, resolution, or channel type than the open audio file, Adobe
Auditionconvertstheselectedfilestomatchtheopenfile.Forthebestresults,appendfileswiththesamesampletypeas
the original audio file.
4 Click Append.
Import a bitmap image as audio
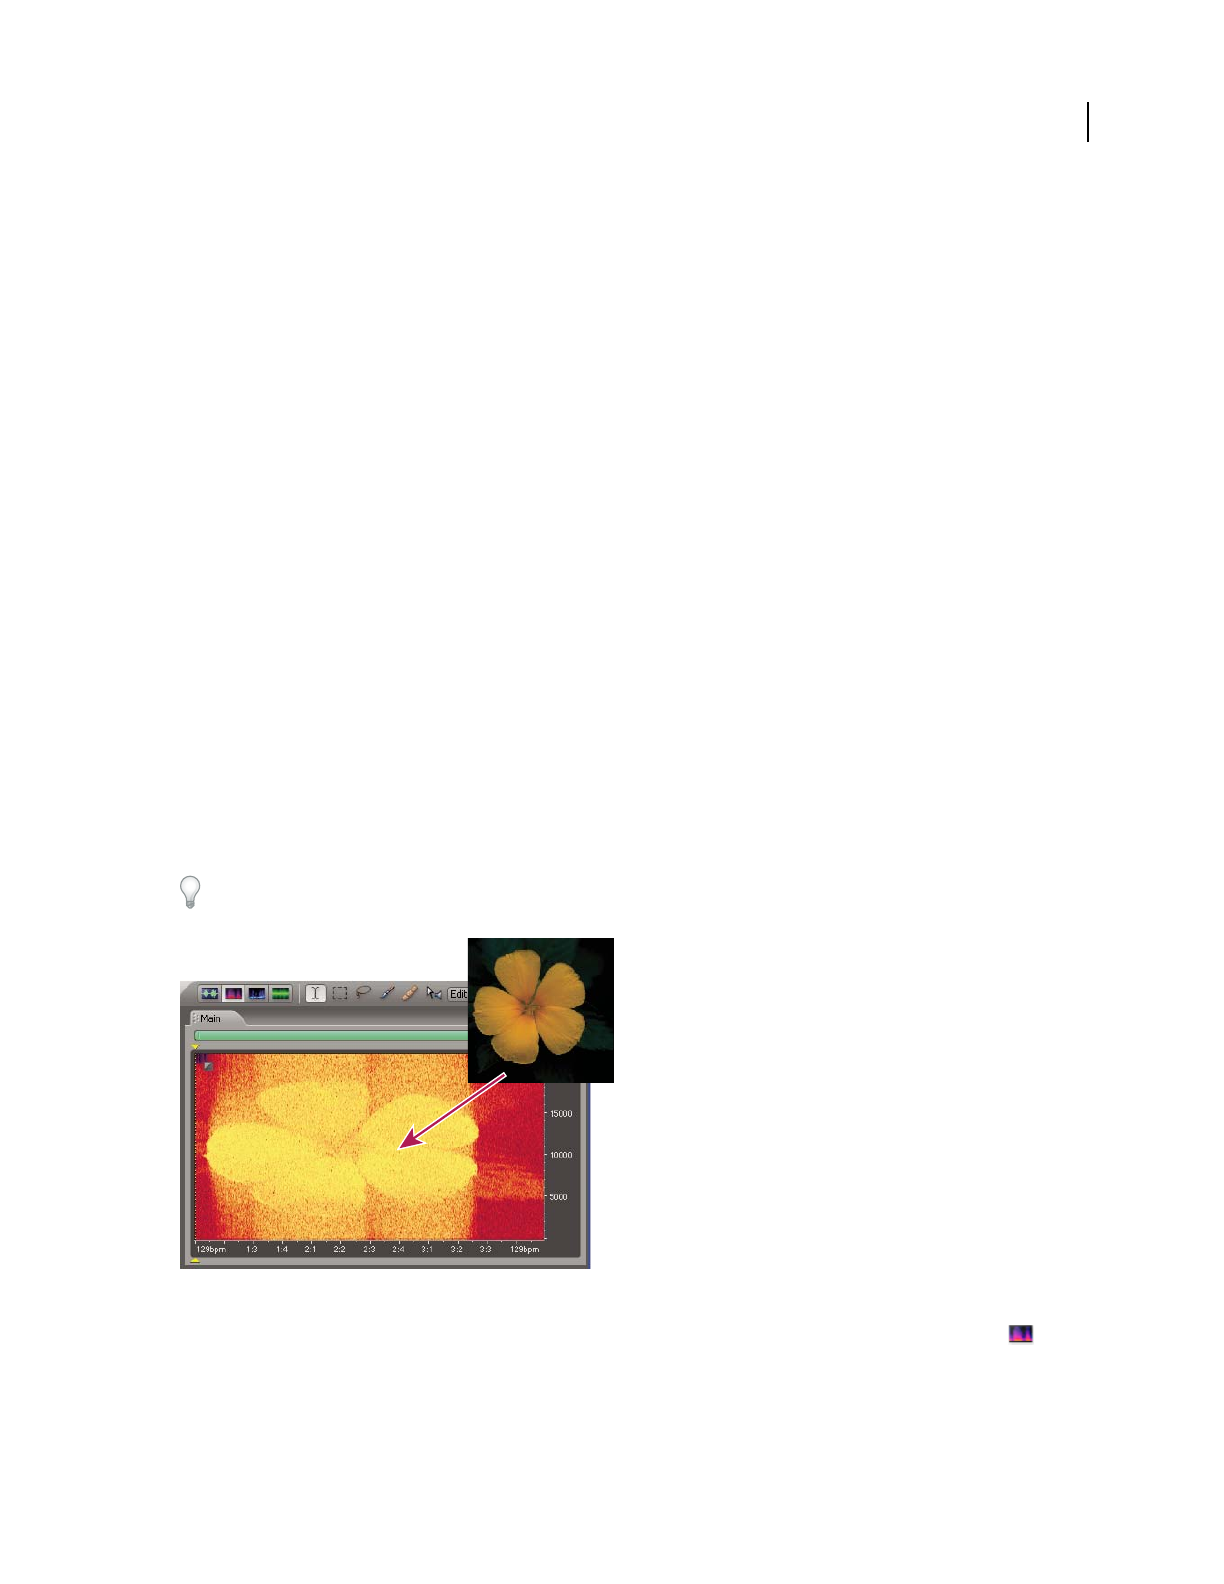
In Edit View, you can import bitmap image (BMP) files created by any application. For the most predictable sonic
results, import images of spectral graphs you saved from Adobe Audition and modified in an image-editing appli-
cation. For sonic experimentation, import photographs, logos, and other visually-oriented files.
Whenimportingasavedspectralgraph,makesuretherelatedphasefileisinthesamefolder.Formoreinformation
about saving spectral graphs, see “Spectral Bitmap Image (.bmp)” on page 250.
Bitmap image imported into spectral frequency selection
1 (Optional) Open an audio file you want to incorporate an image into. Then, in Spectral Frequency Display ,
select a time or frequency range.
2 Choose File > Import Bitmap.


