
Operation Manual
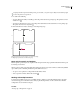

Table Of Contents
- Contents
- Chapter 1: Getting started
- Chapter 2: Digital audio fundamentals
- Chapter 3: Workflow and workspace
- Chapter 4: Setting up Adobe Audition
- Chapter 5: Importing, recording, and playing audio
- Chapter 6: Editing audio files
- Displaying audio in Edit View
- Selecting audio
- Copying, cutting, pasting, and deleting audio
- Visually fading and changing amplitude
- Working with markers
- Creating and deleting silence
- Inverting and reversing audio
- Generating audio
- Analyzing phase, frequency, and amplitude
- Converting sample types
- Recovery and undo
- Chapter 7: Applying effects
- Chapter 8: Effects reference
- Amplitude and compression effects
- Delay and echo effects
- Filter and equalizer effects
- Modulation effects
- Restoration effects
- Reverb effects
- Special effects
- Stereo imagery effects
- Changing stereo imagery
- Binaural Auto-Panner effect (Edit View only)
- Center Channel Extractor effect
- Channel Mixer effect
- Doppler Shifter effect (Edit View only)
- Graphic Panner effect
- Pan/Expand effect (Edit View only)
- Stereo Expander effect
- Stereo Field Rotate VST effect
- Stereo Field Rotate process effect (Edit View only)
- Time and pitch manipulation effects
- Multitrack effects
- Chapter 9: Mixing multitrack sessions
- Chapter 10: Composing with MIDI
- Chapter 11: Loops
- Chapter 12: Working with video
- Chapter 13: Creating surround sound
- Chapter 14: Saving and exporting
- Saving and exporting files
- Audio file formats
- About audio file formats
- 64-bit doubles (RAW) (.dbl)
- 8-bit signed (.sam)
- A/mu-Law Wave (.wav)
- ACM Waveform (.wav)
- Amiga IFF-8SVX (.iff, .svx)
- Apple AIFF (.aif, .snd)
- ASCII Text Data (.txt)
- Audition Loop (.cel)
- Creative Sound Blaster (.voc)
- Dialogic ADPCM (.vox)
- DiamondWare Digitized (.dwd)
- DVI/IMA ADPCM (.wav)
- Microsoft ADPCM (.wav)
- mp3PRO (.mp3)
- NeXT/Sun (.au, .snd)
- Ogg Vorbis (.ogg)
- SampleVision (.smp)
- Spectral Bitmap Image (.bmp)
- Windows Media Audio (.wma)
- Windows PCM (.wav, .bwf)
- PCM Raw Data (.pcm, .raw)
- Video file formats
- Adding file information
- Chapter 15: Automating tasks
- Chapter 16: Building audio CDs
- Chapter 17: Keyboard shortcuts
- Chapter 18: Digital audio glossary
- Index

ADOBE AUDITION 3.0
User Guide
32
5 Do any of the following:
• Under Edit View, choose stereo ports from the Default Input and Default Output menus.
• Under Multitrack View, choose stereo or mono ports from the Default Input and Default Output menus.
In a multitrack session, you can override the defaults for a particular track. (See “Assign audio inputs and outputs
to tracks” on page 186.)
• Under Surround Encoder, choose output ports for each surround channel in the Output Channel Mapping area.
(For information about device requirements, see “Set the preview device for surround mixes” on page 237.)
Set driver properties for a sound card
To improve the performance of ASIO and DirectSound cards, optimize driver properties.
1 Choose Edit > Audio Hardware Setup, and click Control Panel.
2 Do one of the following, and then click OK.
• In an ASIO control panel provided by the sound card manufacturer, set driver options. (The options available will
be different than those described below. For more information, consult the documentation for the sound card.)
Note: By default, Adobe Audition controls the ASIO sound card while playing or monitoring audio. If you want to access
the card in another application, select Release ASIO Driver In Background.
• In the DirectSound Full Duplex Setup control panel, set the following options:
Device check boxes
Use the check boxes under Direct Sound Output Ports and Direct Sound Input Ports to turn
devicesonoroff.Whenaportisdeselected,itisnotavailableasaportoptionintheAudioHardwareSetupdialogbox.
Buffer Size (Samples) Usually, the default settings work well for both playback (DirectSound Output Ports) and
recording (DirectSound Input Ports), but some sound cards may require different settings. If you hear skips or
dropouts in playback, you can adjust buffer size: Double-click the Buffer Size numerical entry for an input or output
device, and type a new value.
Port Order If the selected device includes more than one port, click the Move Up or Move Down button to change
the order of the ports for that device.
Sync Reference Specify whether you want the DirectSound Input or the DirectSound Output to set the master clock.
Full Duplex SelectthistoenableAdobeAuditiontorecordanaudiotrackwhileanotheroneplaysback,ifthesound
card is capable of doing so.
Start Input First This determines the order in which Adobe Audition starts the sound card playback (in) and record
(out) ports in a multitrack environment. Select this option only if you have an older sound card that doesn’t support
full duplexing.
Connecting to MIDI devices and applications
Musical Instrument Digital Interface (MIDI) is a standard for communicating performance information from one
piece of software or hardware to another. In Windows, you can transmit MIDI data internally between applications, or
externally to and from devices such as MIDI keyboards. In Adobe Audition, you can utilize MIDI in the following ways:
• Using the MIDI sequencer, you can import, record, and edit MIDI data, and you can output it through VSTi
virtual instruments or hardware synthesizers. (See Composing with MIDI.)