Operation Manual
Table Of Contents
- Contents
- Chapter 1: Getting started
- Chapter 2: Digital audio fundamentals
- Chapter 3: Workflow and workspace
- Chapter 4: Setting up Adobe Audition
- Chapter 5: Importing, recording, and playing audio
- Chapter 6: Editing audio files
- Displaying audio in Edit View
- Selecting audio
- Copying, cutting, pasting, and deleting audio
- Visually fading and changing amplitude
- Working with markers
- Creating and deleting silence
- Inverting and reversing audio
- Generating audio
- Analyzing phase, frequency, and amplitude
- Converting sample types
- Recovery and undo
- Chapter 7: Applying effects
- Chapter 8: Effects reference
- Amplitude and compression effects
- Delay and echo effects
- Filter and equalizer effects
- Modulation effects
- Restoration effects
- Reverb effects
- Special effects
- Stereo imagery effects
- Changing stereo imagery
- Binaural Auto-Panner effect (Edit View only)
- Center Channel Extractor effect
- Channel Mixer effect
- Doppler Shifter effect (Edit View only)
- Graphic Panner effect
- Pan/Expand effect (Edit View only)
- Stereo Expander effect
- Stereo Field Rotate VST effect
- Stereo Field Rotate process effect (Edit View only)
- Time and pitch manipulation effects
- Multitrack effects
- Chapter 9: Mixing multitrack sessions
- Chapter 10: Composing with MIDI
- Chapter 11: Loops
- Chapter 12: Working with video
- Chapter 13: Creating surround sound
- Chapter 14: Saving and exporting
- Saving and exporting files
- Audio file formats
- About audio file formats
- 64-bit doubles (RAW) (.dbl)
- 8-bit signed (.sam)
- A/mu-Law Wave (.wav)
- ACM Waveform (.wav)
- Amiga IFF-8SVX (.iff, .svx)
- Apple AIFF (.aif, .snd)
- ASCII Text Data (.txt)
- Audition Loop (.cel)
- Creative Sound Blaster (.voc)
- Dialogic ADPCM (.vox)
- DiamondWare Digitized (.dwd)
- DVI/IMA ADPCM (.wav)
- Microsoft ADPCM (.wav)
- mp3PRO (.mp3)
- NeXT/Sun (.au, .snd)
- Ogg Vorbis (.ogg)
- SampleVision (.smp)
- Spectral Bitmap Image (.bmp)
- Windows Media Audio (.wma)
- Windows PCM (.wav, .bwf)
- PCM Raw Data (.pcm, .raw)
- Video file formats
- Adding file information
- Chapter 15: Automating tasks
- Chapter 16: Building audio CDs
- Chapter 17: Keyboard shortcuts
- Chapter 18: Digital audio glossary
- Index

ADOBE AUDITION 3.0
User Guide
224
Creating loops in Edit View
Select a range for a loop
To create a good loop from an existing file, you first need to select a range that repeats precisely on a beat. Repeating
on a beat lets you combine a loop in rhythm with other loops.
1 In Edit View, open a file from which you want to create a loop.
2 Choose Edit > Auto-Mark > Find Beats And Mark. Then specify the Decibel Rise and Rise Time for beats, and
click OK.
3 Choose Edit > Snapping > Snap To Zero Crossings.
This command makes your selection snap to places in the waveform that have zero amplitude, preventing audible
noise at the beginning and end of the loop.
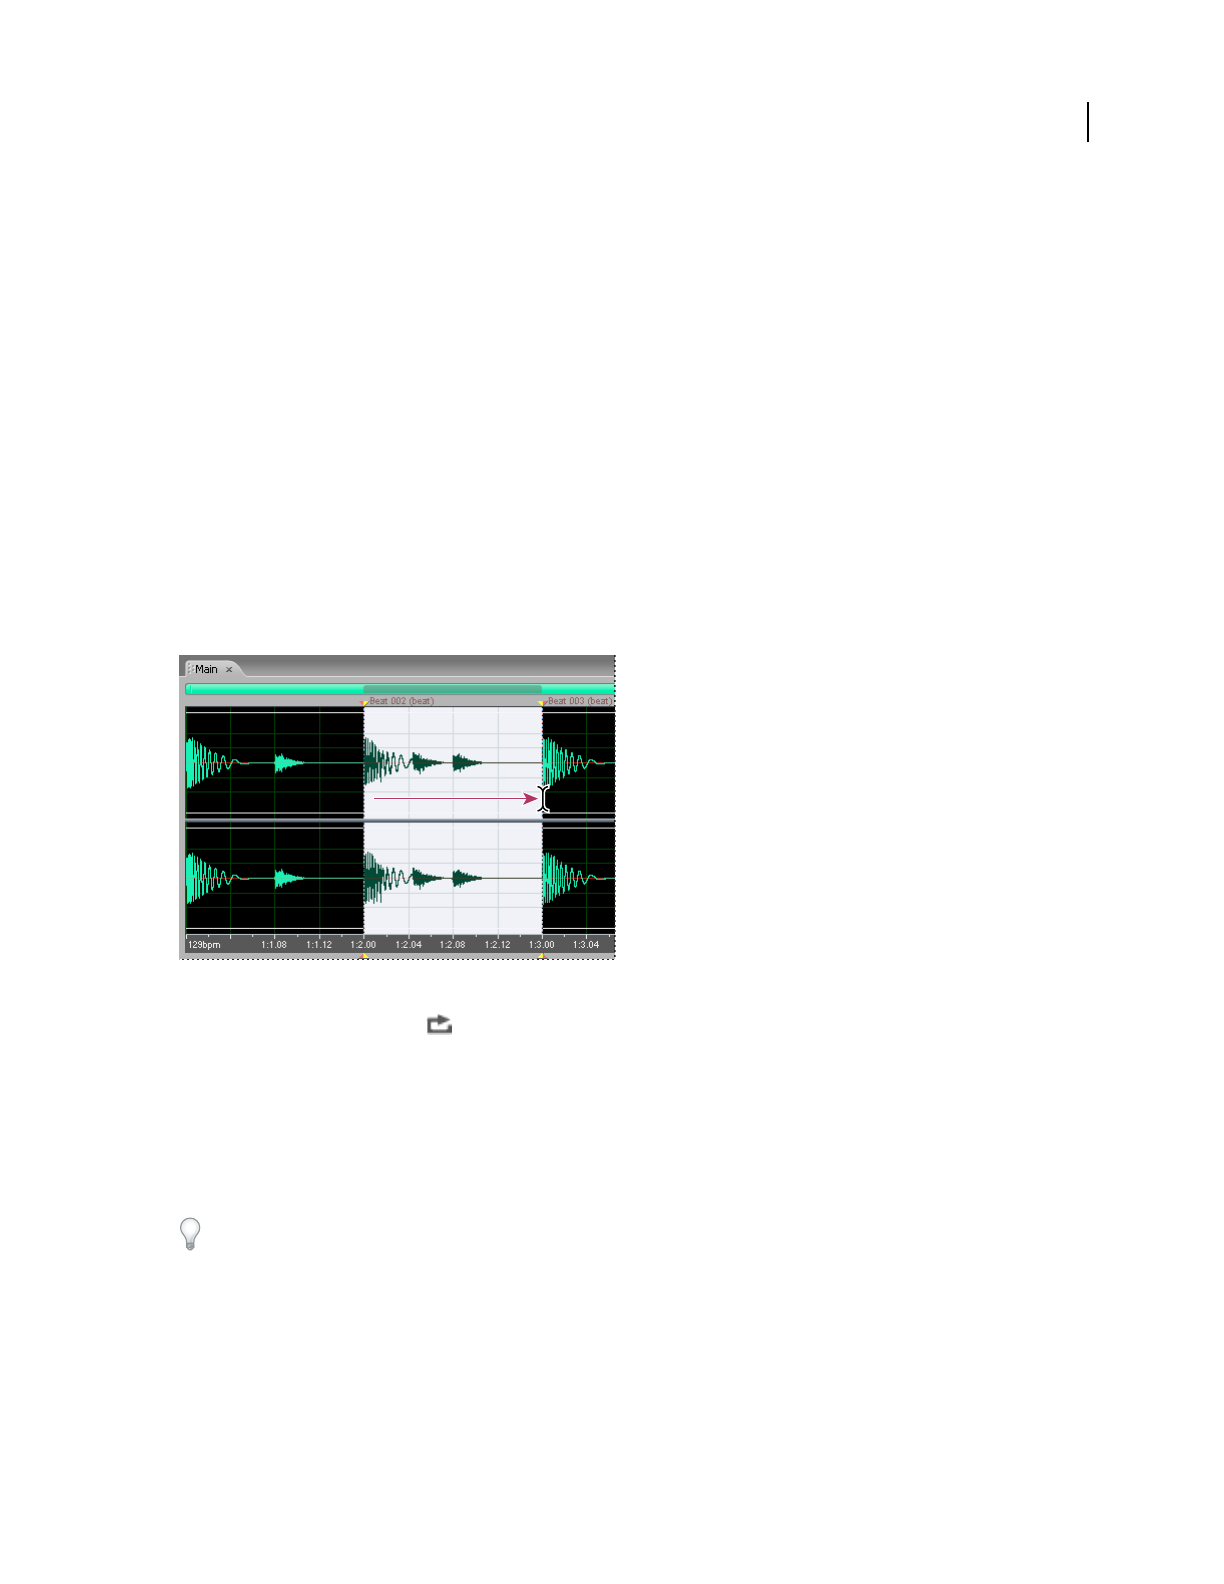
4 Select the range that you want to become a loop, typically starting and ending on a beat.
For guidance, use the beats you marked in step 2, together with commands in the Edit > Find Beats menu. (See
“Select audio between beats” on page 75.)
Selecting a range that starts and ends on a clear beat helps create a good loop.
5 Click the Play Looped button to repeatedly play your selection.
6 Adjust the start and end of the selection to fine-tune the loop.
7 Choose View > Display Time Format > Edit Tempo to calculate the tempo of the selected range, and then
click OK.
8 Choose Edit > Copy To New.
9 In the new file, choose File > File Info, click the Loop Info tab, and set original loop properties.
To create a loop that repeats seamlessly, see “View the top and tail of an audio file” on page 71.
See also
“Snap to markers, rulers, frames, and zero crossings” on page 76
“Calculate the tempo of a selected range” on page 225
“Set original loop properties” on page 225


