
Operation Manual


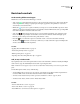
Table Of Contents
- Contents
- Chapter 1: Getting started
- Chapter 2: Digital audio fundamentals
- Chapter 3: Workflow and workspace
- Chapter 4: Setting up Adobe Audition
- Chapter 5: Importing, recording, and playing audio
- Chapter 6: Editing audio files
- Displaying audio in Edit View
- Selecting audio
- Copying, cutting, pasting, and deleting audio
- Visually fading and changing amplitude
- Working with markers
- Creating and deleting silence
- Inverting and reversing audio
- Generating audio
- Analyzing phase, frequency, and amplitude
- Converting sample types
- Recovery and undo
- Chapter 7: Applying effects
- Chapter 8: Effects reference
- Amplitude and compression effects
- Delay and echo effects
- Filter and equalizer effects
- Modulation effects
- Restoration effects
- Reverb effects
- Special effects
- Stereo imagery effects
- Changing stereo imagery
- Binaural Auto-Panner effect (Edit View only)
- Center Channel Extractor effect
- Channel Mixer effect
- Doppler Shifter effect (Edit View only)
- Graphic Panner effect
- Pan/Expand effect (Edit View only)
- Stereo Expander effect
- Stereo Field Rotate VST effect
- Stereo Field Rotate process effect (Edit View only)
- Time and pitch manipulation effects
- Multitrack effects
- Chapter 9: Mixing multitrack sessions
- Chapter 10: Composing with MIDI
- Chapter 11: Loops
- Chapter 12: Working with video
- Chapter 13: Creating surround sound
- Chapter 14: Saving and exporting
- Saving and exporting files
- Audio file formats
- About audio file formats
- 64-bit doubles (RAW) (.dbl)
- 8-bit signed (.sam)
- A/mu-Law Wave (.wav)
- ACM Waveform (.wav)
- Amiga IFF-8SVX (.iff, .svx)
- Apple AIFF (.aif, .snd)
- ASCII Text Data (.txt)
- Audition Loop (.cel)
- Creative Sound Blaster (.voc)
- Dialogic ADPCM (.vox)
- DiamondWare Digitized (.dwd)
- DVI/IMA ADPCM (.wav)
- Microsoft ADPCM (.wav)
- mp3PRO (.mp3)
- NeXT/Sun (.au, .snd)
- Ogg Vorbis (.ogg)
- SampleVision (.smp)
- Spectral Bitmap Image (.bmp)
- Windows Media Audio (.wma)
- Windows PCM (.wav, .bwf)
- PCM Raw Data (.pcm, .raw)
- Video file formats
- Adding file information
- Chapter 15: Automating tasks
- Chapter 16: Building audio CDs
- Chapter 17: Keyboard shortcuts
- Chapter 18: Digital audio glossary
- Index

ADOBE AUDITION 3.0
User Guide
177
Vocoder effect (Multitrack View only)
The Multitrack > Vocoder effect simulates a hardware vocoder. A vocoder takes two inputs, usually an instrument
and a voice, and modulates one signal (the process signal, usually the instrument) with the other (the control signal,
usuallythevoice).Thismodulationallowsonesignalto“control”theother.Intheexamplehere,theinstrument(the
process signal) could be made to “sing” by affecting it with the voice (the control signal).
See also
“Select ranges in Multitrack View” on page 181
“About process effects” on page 104
“Use effect presets” on page 104
Apply the Vocoder effect
1
In separate tracks, position two audio clips so that the sections you want to process together overlap.
2 Select the Hybrid tool or the Time Selection tool .
3 In the Main panel, select the range you want to process.
4 Ctrl-click the audio clips you want to process.
Note: If you select a range by dragging across a clip, that clip is selected by default; if you Ctrl-click the clip, you will
deselect it.
5 Choose Effects > Vocoder, and set the desired options.
Vocoder options
Control Wave (Voice) Sets any active waveform in the session, usually a vocal, as the control signal.
Process Wave (Synth) Sets any active waveform in the session as the process signal. This waveform is usually a
synthesized sound to replace a vocal.
Output To Sets which track to output the resulting waveform to.
FFT Size Specifies the size of the FFT (Fast Fourier Transform). Higher sizes usually create more precise results, but
they take longer to process.
Overlays Sets the number of FFTs that overlap. More overlays can produce smoother results, but they take longer to
process. Values of 3 to 12 work well.
Interval Size Lets you specify the number of milliseconds per FFT. Values between 10 and 30 usually work best,
unless higher overlay settings are used. Smaller values can produce a hum, while larger values can produce blocky
sounding results.
Window Width Lets you specify the percentage per FFT. A value of 90% generally produces good results.
Vocal Crossover Determines the frequency used to filter out, or separate, the source waveform’s underlying base
frequency (voice) from the vocal formants (the vowel sounds). With higher values, more formants and less of the
source voice is carried over. Ideally, you want none of the source voice carried over and all of the formant infor-
mation, so the synthesizer “talks.”
Resynthesis Window Specifies the width of the window used for resynthesizing the vocoded signal. Narrower
windows make hard consonants sound clearer, and with higher overlay settings, they give better time resolution if
the vocoded signal sounds too smoothed out. The numbers available for this option are always lower than the
number of overlays.