
Operation Manual

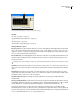
Table Of Contents
- Contents
- Chapter 1: Getting started
- Chapter 2: Digital audio fundamentals
- Chapter 3: Workflow and workspace
- Chapter 4: Setting up Adobe Audition
- Chapter 5: Importing, recording, and playing audio
- Chapter 6: Editing audio files
- Displaying audio in Edit View
- Selecting audio
- Copying, cutting, pasting, and deleting audio
- Visually fading and changing amplitude
- Working with markers
- Creating and deleting silence
- Inverting and reversing audio
- Generating audio
- Analyzing phase, frequency, and amplitude
- Converting sample types
- Recovery and undo
- Chapter 7: Applying effects
- Chapter 8: Effects reference
- Amplitude and compression effects
- Delay and echo effects
- Filter and equalizer effects
- Modulation effects
- Restoration effects
- Reverb effects
- Special effects
- Stereo imagery effects
- Changing stereo imagery
- Binaural Auto-Panner effect (Edit View only)
- Center Channel Extractor effect
- Channel Mixer effect
- Doppler Shifter effect (Edit View only)
- Graphic Panner effect
- Pan/Expand effect (Edit View only)
- Stereo Expander effect
- Stereo Field Rotate VST effect
- Stereo Field Rotate process effect (Edit View only)
- Time and pitch manipulation effects
- Multitrack effects
- Chapter 9: Mixing multitrack sessions
- Chapter 10: Composing with MIDI
- Chapter 11: Loops
- Chapter 12: Working with video
- Chapter 13: Creating surround sound
- Chapter 14: Saving and exporting
- Saving and exporting files
- Audio file formats
- About audio file formats
- 64-bit doubles (RAW) (.dbl)
- 8-bit signed (.sam)
- A/mu-Law Wave (.wav)
- ACM Waveform (.wav)
- Amiga IFF-8SVX (.iff, .svx)
- Apple AIFF (.aif, .snd)
- ASCII Text Data (.txt)
- Audition Loop (.cel)
- Creative Sound Blaster (.voc)
- Dialogic ADPCM (.vox)
- DiamondWare Digitized (.dwd)
- DVI/IMA ADPCM (.wav)
- Microsoft ADPCM (.wav)
- mp3PRO (.mp3)
- NeXT/Sun (.au, .snd)
- Ogg Vorbis (.ogg)
- SampleVision (.smp)
- Spectral Bitmap Image (.bmp)
- Windows Media Audio (.wma)
- Windows PCM (.wav, .bwf)
- PCM Raw Data (.pcm, .raw)
- Video file formats
- Adding file information
- Chapter 15: Automating tasks
- Chapter 16: Building audio CDs
- Chapter 17: Keyboard shortcuts
- Chapter 18: Digital audio glossary
- Index

ADOBE AUDITION 3.0
User Guide
142
“Use effect presets” on page 104
“Add preroll and postroll to effects previews” on page 107
Adaptive Noise Reduction options
Reduce Noise By Determines the level of noise reduction. Values between 6 and 30 dB work well. To reduce bubbly
background effects, enter lower values.
Noisiness Indicates the percentage of original audio that contains noise.
Fine Tune Noise Floor Adjusts the noise floor above or below the automatically calculated floor.
Signal Threshold Adjusts the threshold of desirable audio above or below the automatically calculated threshold.
Spectral Decay Rate Specifies the percentage of frequencies processed when audio falls below the noise floor.
Fine-tuning this percentage allows greater noise reduction with fewer artifacts. Values of 40% to 75% work best.
Below those values, bubbly-sounding artifacts are often heard; above those values, excessive noise typically remains.
Broadband Preservation Retains desirable audio in specified frequency bands between found artifacts. A setting of
100 Hz, for example, ensures that no audio is removed 100 Hz above or below found artifacts.
FFT Size Determines how many individual frequency bands are analyzed. Choose a high setting to increase
frequency resolution; choose a low setting to increase time resolution. High settings work well for artifacts of long
duration (like squeaks or 60-Hz hum), while low settings better address transient artifacts (like clicks and pops).
High Quality Mode Performs slower processing but achieves superior results.
Automatic Click Remover effect
To quickly remove crackle and static from vinyl recordings, use the Restoration > Automatic Click Remover effect.
You can correct a large area of audio or a single click or pop. This effect provides the same processing quality as the
Click/Pop Eliminator effect, but it offers simplified controls and a helpful preview. And because the Automatic Click
Remover is VST-based, you can combine it with other effects in the Mastering Rack and Effects Rack and apply it to
tracks in Multitrack View.
See also
“Applying effects in Edit View” on page 106
“Applying effects in Multitrack View” on page 107
“Use effect presets” on page 104
“Add preroll and postroll to effects previews” on page 107
Automatic Click Remover options
Threshold Determines sensitivity to noise. Lower settings detect more clicks and pops but may include audio you
wish to retain. Settings range from 1 to 100; the default is 30.
Complexity Indicates the complexity of noise. Higher settings apply more processing but can degrade audio quality.
Settings range from 1 to 100; the default is 16.
Automatic Phase Correction effect
The Restoration > Automatic Phase Correction effect addresses azimuth errors from misaligned tape heads, stereo
smearing from incorrect microphone placement, and many other phase-related problems.