
Operation Manual

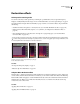
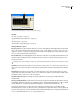
Table Of Contents
- Contents
- Chapter 1: Getting started
- Chapter 2: Digital audio fundamentals
- Chapter 3: Workflow and workspace
- Chapter 4: Setting up Adobe Audition
- Chapter 5: Importing, recording, and playing audio
- Chapter 6: Editing audio files
- Displaying audio in Edit View
- Selecting audio
- Copying, cutting, pasting, and deleting audio
- Visually fading and changing amplitude
- Working with markers
- Creating and deleting silence
- Inverting and reversing audio
- Generating audio
- Analyzing phase, frequency, and amplitude
- Converting sample types
- Recovery and undo
- Chapter 7: Applying effects
- Chapter 8: Effects reference
- Amplitude and compression effects
- Delay and echo effects
- Filter and equalizer effects
- Modulation effects
- Restoration effects
- Reverb effects
- Special effects
- Stereo imagery effects
- Changing stereo imagery
- Binaural Auto-Panner effect (Edit View only)
- Center Channel Extractor effect
- Channel Mixer effect
- Doppler Shifter effect (Edit View only)
- Graphic Panner effect
- Pan/Expand effect (Edit View only)
- Stereo Expander effect
- Stereo Field Rotate VST effect
- Stereo Field Rotate process effect (Edit View only)
- Time and pitch manipulation effects
- Multitrack effects
- Chapter 9: Mixing multitrack sessions
- Chapter 10: Composing with MIDI
- Chapter 11: Loops
- Chapter 12: Working with video
- Chapter 13: Creating surround sound
- Chapter 14: Saving and exporting
- Saving and exporting files
- Audio file formats
- About audio file formats
- 64-bit doubles (RAW) (.dbl)
- 8-bit signed (.sam)
- A/mu-Law Wave (.wav)
- ACM Waveform (.wav)
- Amiga IFF-8SVX (.iff, .svx)
- Apple AIFF (.aif, .snd)
- ASCII Text Data (.txt)
- Audition Loop (.cel)
- Creative Sound Blaster (.voc)
- Dialogic ADPCM (.vox)
- DiamondWare Digitized (.dwd)
- DVI/IMA ADPCM (.wav)
- Microsoft ADPCM (.wav)
- mp3PRO (.mp3)
- NeXT/Sun (.au, .snd)
- Ogg Vorbis (.ogg)
- SampleVision (.smp)
- Spectral Bitmap Image (.bmp)
- Windows Media Audio (.wma)
- Windows PCM (.wav, .bwf)
- PCM Raw Data (.pcm, .raw)
- Video file formats
- Adding file information
- Chapter 15: Automating tasks
- Chapter 16: Building audio CDs
- Chapter 17: Keyboard shortcuts
- Chapter 18: Digital audio glossary
- Index

ADOBE AUDITION 3.0
User Guide
137
Master Gain Compensates for an overall volume level that might be too loud or too soft after you adjust the filter
settings.
Modulation effects
Chorus effect
The Modulation > Chorus effect simulates several voices or instruments played at once by adding multiple short
delays with a small amount of feedback. The result is lush, rich sound. You can use Chorus to enhance a vocal track
or add stereo spaciousness to mono audio. You can also use it to create some truly out-of-this-world special effects.
Adobe Audition uses a direct-simulation method of achieving a chorus effect, making each voice (or layer) sound
distinct from the original by slightly varying timing, intonation, and vibrato. The Feedback setting lets you add extra
detail to the result.
To achieve the best results with mono files, convert them to stereo before applying the Chorus effect.
See also
“Applying effects in Edit View” on page 106
“Applying effects in Multitrack View” on page 107
“Use effect presets” on page 104
“Add preroll and postroll to effects previews” on page 107
Chorus options
Characteristics Represent the characteristics used for each voice (layer) in the chorus. While the properties below
apply to each voice, they represent ranges of random values, so each voice is unique.
• Voices Determines the number of simulated voices.
Note: As you add more voices, the sound becomes richer and richer —but processing time also increases.
• Delay Time Specifies the maximum amount of delay allowed. An important component of chorusing is the intro-
duction of short delays (often in the 15-35 millisecond range) that vary in duration over time. If the setting is very
small, all the voices start merging into the original, and an unnatural flanging effect might occur. If the setting is too
high, a warbled effect might occur, like a tape being eaten by a cassette deck.
• Delay Rate Determines the time the delay takes to cycle from zero to the maximum delay setting. Because the
actual delay used varies over time, the pitch of the sample increases or decreases over time, placing each voice slightly
out of tune with the others (giving the effect of separate voices). For example, a value of 2 Hz would vary the delay
from zero to the maximum and back twice per second (simulating a pitch vibrato at twice per second). If this setting
is too low, the individual voices don’t vary much in pitch. If it is set too high, the voices may vary so quickly that a
warbled effect might occur.
• Feedback Adds a percentage of processed voices back into the effect input. Feedback can give a waveform an extra
echo or reverb effect. A little feedback (less than 10%) can provide extra richness, depending on the delay and vibrato
settings. Higher settings produce more traditional feedback, a loud ringing which can get loud enough to clip the
signal.Sometimesthisclippingisadesiredeffect,asintheFlyingSaucerspreset,whichgeneratesthewarbledsounds
of UFOs whizzing around your head.