
Operation Manual
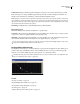


Table Of Contents
- Contents
- Chapter 1: Getting started
- Chapter 2: Digital audio fundamentals
- Chapter 3: Workflow and workspace
- Chapter 4: Setting up Adobe Audition
- Chapter 5: Importing, recording, and playing audio
- Chapter 6: Editing audio files
- Displaying audio in Edit View
- Selecting audio
- Copying, cutting, pasting, and deleting audio
- Visually fading and changing amplitude
- Working with markers
- Creating and deleting silence
- Inverting and reversing audio
- Generating audio
- Analyzing phase, frequency, and amplitude
- Converting sample types
- Recovery and undo
- Chapter 7: Applying effects
- Chapter 8: Effects reference
- Amplitude and compression effects
- Delay and echo effects
- Filter and equalizer effects
- Modulation effects
- Restoration effects
- Reverb effects
- Special effects
- Stereo imagery effects
- Changing stereo imagery
- Binaural Auto-Panner effect (Edit View only)
- Center Channel Extractor effect
- Channel Mixer effect
- Doppler Shifter effect (Edit View only)
- Graphic Panner effect
- Pan/Expand effect (Edit View only)
- Stereo Expander effect
- Stereo Field Rotate VST effect
- Stereo Field Rotate process effect (Edit View only)
- Time and pitch manipulation effects
- Multitrack effects
- Chapter 9: Mixing multitrack sessions
- Chapter 10: Composing with MIDI
- Chapter 11: Loops
- Chapter 12: Working with video
- Chapter 13: Creating surround sound
- Chapter 14: Saving and exporting
- Saving and exporting files
- Audio file formats
- About audio file formats
- 64-bit doubles (RAW) (.dbl)
- 8-bit signed (.sam)
- A/mu-Law Wave (.wav)
- ACM Waveform (.wav)
- Amiga IFF-8SVX (.iff, .svx)
- Apple AIFF (.aif, .snd)
- ASCII Text Data (.txt)
- Audition Loop (.cel)
- Creative Sound Blaster (.voc)
- Dialogic ADPCM (.vox)
- DiamondWare Digitized (.dwd)
- DVI/IMA ADPCM (.wav)
- Microsoft ADPCM (.wav)
- mp3PRO (.mp3)
- NeXT/Sun (.au, .snd)
- Ogg Vorbis (.ogg)
- SampleVision (.smp)
- Spectral Bitmap Image (.bmp)
- Windows Media Audio (.wma)
- Windows PCM (.wav, .bwf)
- PCM Raw Data (.pcm, .raw)
- Video file formats
- Adding file information
- Chapter 15: Automating tasks
- Chapter 16: Building audio CDs
- Chapter 17: Keyboard shortcuts
- Chapter 18: Digital audio glossary
- Index

ADOBE AUDITION 3.0
User Guide
124
“Control effects settings with graphs” on page 104
“Use effect presets” on page 104
Dynamic Delay options
Original and Delayed Mixes in the desired amounts of original and delayed audio.
Invert Inverts the delayed signal, causing the waves to cancel out periodically, instead of reinforcing the signal.
Delay graph Indicates the amount of delay. The horizontal ruler (x-axis) represents time, and the vertical ruler
(y-axis) represents the length of delay.
Feedback graph Indicates the amount of feedback. The x-axis represents time, and the y-axis represents the
percentage of feedback.
Loop Graphs Restricts the graph to the length you specify so the effect loops repeatedly over the course of the
selection. Selecting this option lets you specify Period (how long the graph should be), Frequency (how fast the loop
should repeat), and Total Cycles (how many times you want the graph to loop in the given selection). These settings
interact; changing one changes the others. If Loop Graph is deselected, the graph equals the length of the entire
selection, so the effect doesn’t loop.
Stereo Curve Delay Represents the number of milliseconds one channel is behind the other, creating a stereo
phasing sound. Positive values delay the right channel, while negative values delay the left.
Echo effect
The Delay And Echo > Echo effect adds a series of repeated, decaying echoes to a sound. (For a single echo, use the
Delay effect instead.) You can create effects ranging from a Grand Canyon-type “Hello-ello-llo-lo-o” to metallic,
clanging drainpipe sounds by varying the delay amount. By equalizing the delays, you can change a room’s charac-
teristic sound from one with reflective surfaces (creating echoes that sound brighter) to one that is almost totally
absorptive (creating echoes that sound darker).
Note: Make sure the audio file is long enough for the echo to end. If the echo is cut off abruptly before it fully decays,
undo the Echo effect, add several seconds of silence by choosing Generate > Silence, and then reapply the effect.
See also
“Applying effects in Edit View” on page 106
“Applying effects in Multitrack View” on page 107
“Use effect presets” on page 104
“Add preroll and postroll to effects previews” on page 107
Echo options
Left and Right Channel settings Let you define these echo characteristics:
• Delay Time Specifies the number of milliseconds, beats, or samples between each echo. For example, a setting of
100 milliseconds results in a 1/10th-second delay between successive echoes.
• Feedback Determines the falloff ratio of an echo. Each successive echo tails off at a certain percentage less than
the previous one. A decay setting of 0% results in no echo at all, while a decay of 100% produces an echo that never
gets quieter.
• Mix Sets the percentage of echoed (wet) signal to mix with the original (dry) signal in the final output.