
Operation Manual


Table Of Contents
- Contents
- Chapter 1: What’s new
- Chapter 2: Workspace
- Workspace basics
- Opening and viewing PDFs
- Navigating PDF pages
- Adjusting PDF views
- Adjust page magnification
- Resize a page to fit the window
- Show a page at actual size
- Change the magnification with zoom tools
- Change the magnification with the Pan & Zoom Window tool
- Change the magnification with the Loupe tool
- Change the magnification by using a page thumbnail
- Change the default magnification
- Display off-screen areas of a magnified page
- Set the page layout and orientation
- Use split-window view
- View a document in multiple windows
- Adjust page magnification
- Grids, guides, and measurements
- Maintaining the software
- Activation and registration
- Adobe Product Improvement Program
- Services and downloads
- Non-English languages
- Chapter 3: Creating PDFs
- Overview of creating PDFs
- Creating simple PDFs with Acrobat
- Scan documents to PDF
- Using the Adobe PDF printer
- Creating PDFs with PDFMaker (Windows)
- Converting web pages to PDF
- Creating PDFs with Acrobat Distiller
- Adobe PDF conversion settings
- Fonts
- Chapter 4: PDF Portfolios and combined PDFs
- PDF Portfolios
- Other options for combining files
- Adding unifying page elements
- Add and edit headers and footers
- Add and edit backgrounds
- Add, replace, or edit a background, with an open document
- Add, replace, or edit a background, with no document open (Windows only)
- Add, replace, or edit a background for component PDFs in a PDF Portfolio
- Update a recently edited background image
- Remove a background from selected pages
- Remove a background from all pages
- Add and edit watermarks
- Crop pages
- Rearranging pages in a PDF
- Chapter 5: Saving and exporting PDFs
- Chapter 6: Collaboration
- File sharing and real-time collaboration
- Preparing for a PDF review
- Starting a review
- Participating in a PDF review
- Tracking and managing PDF reviews
- Commenting
- Annotations and drawing markup tools overview
- Commenting preferences
- Change the look of your comments
- Add a sticky note
- Mark up text with edits
- Stamp a document
- Create a custom stamp
- Add a line, arrow, or shape
- Group and ungroup markups
- Add comments in a text box or callout
- Add an audio comment
- Add comments in a file attachment
- Paste images as comments
- Managing comments
- Importing and exporting comments
- Approval workflows
- Chapter 7: Forms
- Forms basics
- Creating and distributing forms
- About form elements
- Create forms using Acrobat
- Create online forms using FormsCentral
- Enable Reader users to save form data
- Adding JavaScript to forms
- Create form fields
- Lay out form fields on a grid
- Copy a form field
- Select multiple form fields
- Resize and arrange form fields
- About barcodes
- Create, test, and edit barcode fields
- Set form field navigation
- Distribute (send) forms to recipients
- Form fields behavior
- About form field properties
- Modify form field properties
- General tab for form field properties
- Appearance tab for form field properties
- Options tab for form field properties
- Actions tab for form field properties
- Calculate tab for form field properties
- Set the calculation order of form fields
- Signed tab for form field properties
- Format tab for form field properties
- Validation tab for form field properties
- Value tab for form field properties
- Manage custom barcode settings
- Redefine form field property defaults
- Setting action buttons
- Publishing interactive web forms
- Collecting and managing form data
- Filling in forms
- Chapter 8: Security
- Application security
- Content security
- Opening secured documents
- Choosing a security method
- Securing documents with passwords
- Securing documents with certificates
- Certificate security
- Encrypt a PDF or PDF Portfolio with a certificate
- Change encryption settings
- Remove encryption settings
- Sharing certificates with others
- Get certificates from other users
- Associate a certificate with a contact
- Verify information on a certificate
- Delete a certificate from trusted identities
- Securing documents with Adobe LiveCycle Rights Management ES
- Setting up security policies
- Digital IDs
- Removing sensitive content
- Chapter 9: Digital signatures
- About digital signatures
- Comparing ink signatures with digital signatures
- Setting up signing
- Setting up signature validation
- Signing PDFs
- Validating signatures
- Signatures panel overview
- Validate a signature manually
- Validate a timestamp certificate
- View previous versions of a signed document
- Compare versions of a signed document
- Trust a signer’s certificate
- PDF Portfolios and digital signatures
- XML data signatures
- Checking the validity of a signature
- Establish long-term signature validation
- Manage trusted identities
- Chapter 10: Accessibility, tags, and reflow
- Accessibility features
- Checking the accessibility of PDFs
- Reading PDFs with reflow and accessibility features
- Creating accessible PDFs
- Making existing PDFs accessible
- Chapter 11: Editing PDFs
- Page thumbnails and bookmarks
- Links and attachments
- Converted web pages
- Articles
- Text and objects
- Setting up a presentation
- Document properties and metadata
- Layers
- Actions and scripting
- Using Geospatial PDFs
- Chapter 12: Searching and indexing
- Chapter 13: Multimedia and 3D models
- Multimedia in PDFs
- Interacting with 3D models
- Displaying 3D models
- 3D toolbar overview
- Examples of model rendering modes
- Change rendering mode, lighting, projection, and background
- Model Tree overview
- Hide, isolate, and change the appearance of parts
- Create cross sections
- Measure 3D objects
- Measuring preferences
- Change camera properties
- Set 3D views
- 3D preferences
- Comment on 3D designs
- Run a JavaScript
- Chapter 14: Color management
- Chapter 15: Printing
- Chapter 16: Keyboard shortcuts
274
USING ACROBAT X STANDARD
Editing PDFs
Last updated 10/11/2011
Replace custom fonts with local fonts
Documents scanned to PDF using the ClearScan option in Acrobat can’t be edited until you replace the fonts. During
the conversion to PDF, ClearScan converts the fonts in the document to custom fonts. To edit the scanned text, replace
the custom fonts with fonts that you have on your computer. These fonts are called system or local fonts.
1 Use the TouchUp Text tool to select the text you want to edit.
2 Right-click/Command-click the selected text, and choose Properties. Make sure the Text tab opens.
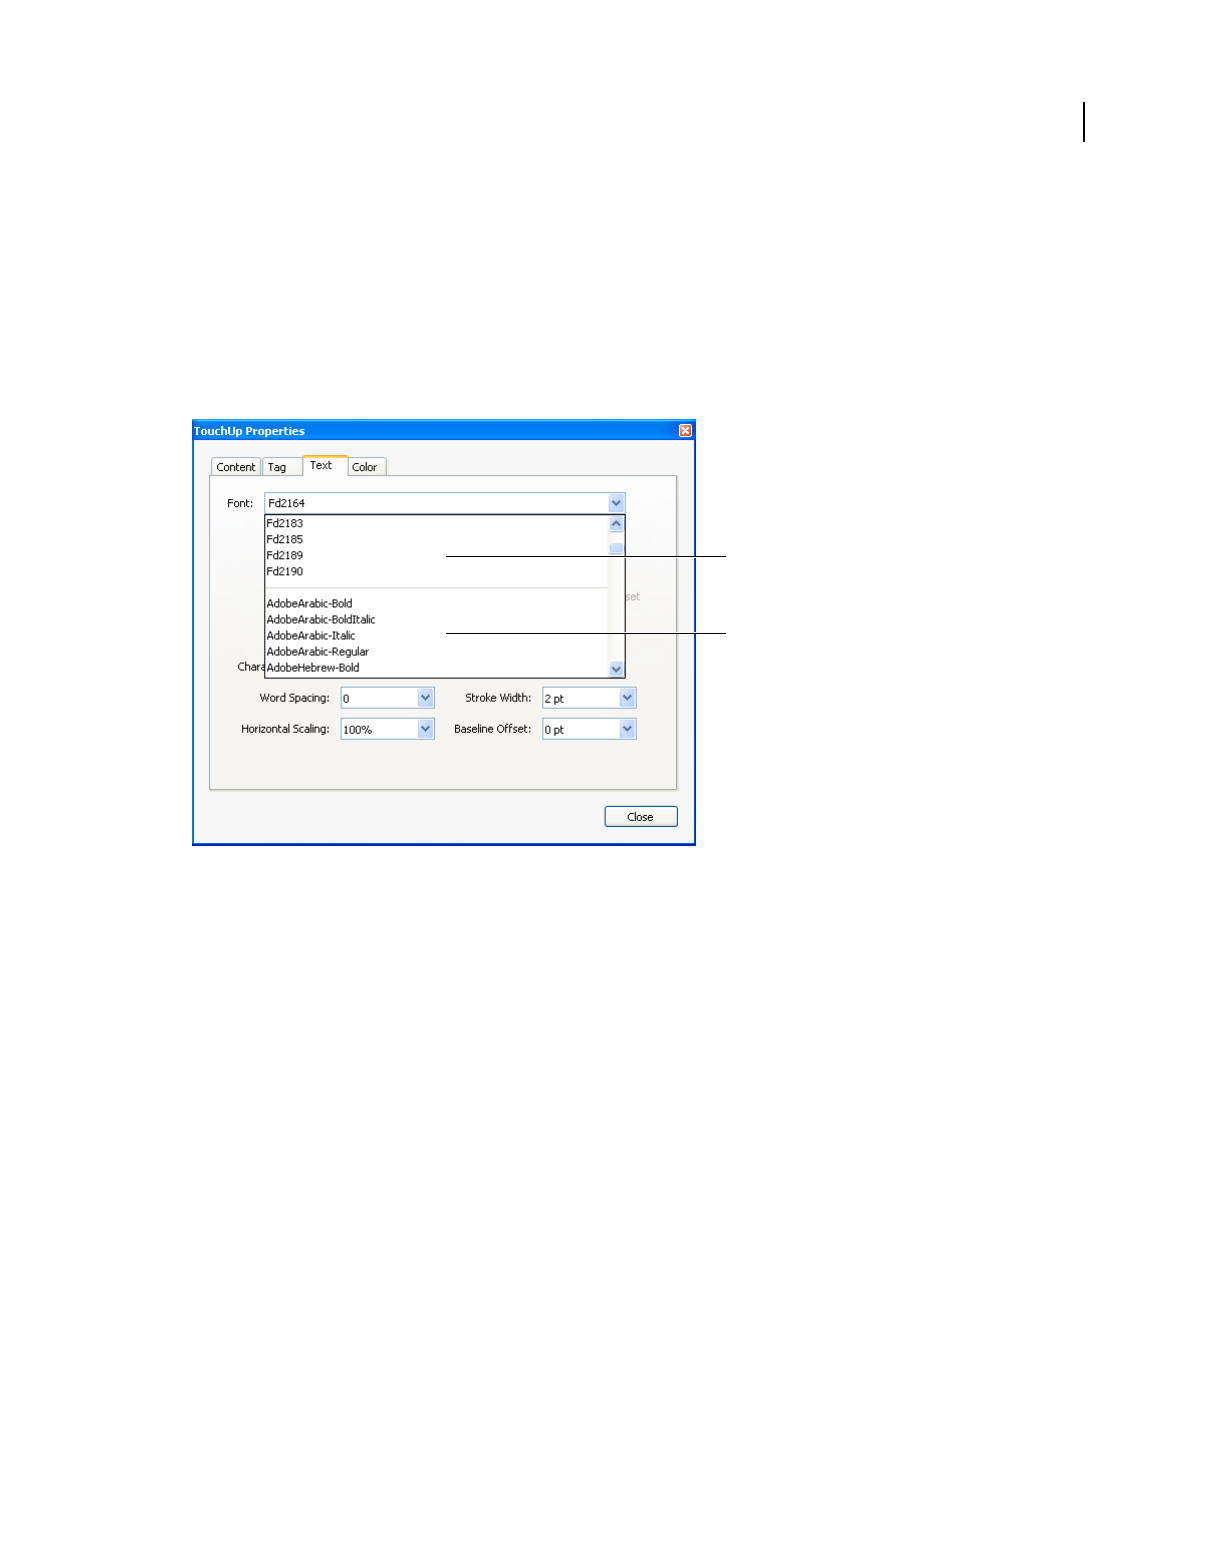
3 Open the Font menu, and select a font below the line that closely matches the custom font.
Replace custom fonts (A) with local fonts (B).
4 In the Font Size menu, select a size that closely matches the custom font.
5 Leave the other properties in the Text tab as they are.
Edit text attributes
1 Select Tools > Content > Edit Document Text.
2 Click in the text you want to edit.
3 Right-click the text, and choose Properties.
4 In the TouchUp Properties dialog box, click the Text tab. You can change any of the following text attributes:
Font Changes the font used by the selected text to the font you specify. You can select any font installed on your system
or fully embedded in the PDF document. Document fonts are listed at the top; system fonts are listed below.
Font Size Changes the font size to the size (in points) that you specify.
Character Spacing Inserts uniform spacing between two or more characters in selected text.
Word Spacing Inserts uniform spacing between two or more words in selected text.
Horizontal Scaling Specifies the proportion between the height and the width of the type.
Baseline Offset Offsets the text from the baseline. The baseline is the line on which the type rests.
Fill Specifies the fill color.
A
B