
Installation guide
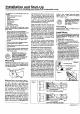


Required Exhaust
Openings
Using standard CFM ratings, a common [[_.L_
method of determining how much to open
doors or windows for proper exchange is:
2 square feet per 1000 CFM.
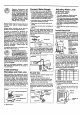
Pre-Start-Up Inspection
Assure that:
• Cooler mounting is level; duct is sealed.
• Cabinet issecurely fastennd to mounting.
• Cooler cabinet is grounded. Electrical
connections are safe and secure.
• Motor, pump, and float installed. Motor
and pump plugged intojunction box.
• Pump impeller turnsfreely. Remove pump
and basket. Remove impeller cover (see
FigurelO and spin the impeller to assure
free rotation).
• Water lineconnectedsecurelywithout
leaks.Water supplyturnedon.
• Floatadjusted forproperwater level.
• Blower, shaft, collar, and pulley set bolts
are snug (do not overllghtan pulley boll).
• Pulley alignment okay; belt tension okay
(see page 3 for instructions).
• Blowerbearingsarelubricated.Filloilcup
witha goodgrade SAE2OWor30W oil
• Pad is pre-soaked. Check to see that
pump starts and pad is evenly Wet.
• Open windows or vents in house.
• In case of trouble in any oi these stag_,
refer to the Troubleshooting Chad on
page 7.
Caution: Never operate unit
with service panels, pad
or inlet _ter removed This
will result In am overloaded
€ondition and may damage
the blower motor.
Periodic Inspection
In addition to the planned maintenance
schedule, regular inspection of your
MasterCool cooler willenhance the chance
for longtrouble-free service life.
Checklist
Check for leaks
0 Is cooler level?
0 Are there dry spots on the pad when
cooler is in operation?
CI Does blower turn freely?
0 Is there 25 Ibs.tension (models 63/64)
20 It=. tension (models 43/44) on drive
belt?
0 Are bolts, nuts, and set screws snug?
0 Is float set correctly?
0 Is water pan clean?
Cabinet Cleaning and
Touch-up
The cabinet and all internal parts except
blower and drives are fumlehed with a hard
appliance-type Polybond• coating. This
surface is highlyresistant to scale and cor-
rosion.Asoftcloth, warm water, and a mild
cleanser will bdng all surfaces back to like
new appearance. Avoidsteel wool or sand-
paper in normal cleaning of the cabinet.
Scratches and Bare Metal
In the unlikelyevent that scratches or bare
metal areasoccur, sand orrubthe area with
steel wool to prepare the finish. Paint with
standard paint or touch-up paint available
through your dealer.
Changing Pad
This should be done after 5 years or if
passages are clogged.
NOTE: Hosing off inlet face of pad can
unclog passages of dust, and minerals ac-
cumulated there. Light ecrapinge of the in-
take edges of the pad will not harm its
openings and will remove more stubborn
scale.
Caution: Avoid splashing
water on blower motor.
• Remove wet section top.
• Remove water distdbutor assembly,
disconnecting hose.
• Lift out used pad sections.
• Replace wllh new MastarCool pad only,
available from your dealer. Aspen and
other evaporative pads WILL NOT
WORK.
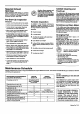
Maintenance Schedule
Regular maintenance isa key to long successful service of your MasterCool cooler. The selvice schedule willhelp you maintain an efficient
unit with good appearance.
MAINTENANCE REQUIREMENTS ANNUAL ANNUAL
(LOCATION IN MANUAL) START-UP SHUT DOWN
Changing pad (p. 5) At beginning of 6th
year or ifpassages
are blocked.
Cleaning & touch-up (p. 5) X
Cleaning water pump (!o.6) X
Lubrication (p. 6) X
Adjusting bell tehsion (p. 6) X As needed
Periodic inspection (p. 5) Duringcoolingseason Duringcoolingseason
Snugging downset screws & nuts(p. 6) X
Adjustingblend-off(p.4) X
Washing down pad withhose(p. 6) X
Drain allwater lines to and fromthe
cooler toprevent freezing X
NOTES:
DO NOT UNDERCOAT THE WATER
RESERVOIR.
Your MastarCoolII cooler'swater reser-
voirisfinishedwitha Polybond®appliance
type finish. It is so hard, asphalt type
coolerundercoatwillnotstickto it.Under-
coat will break free and clog pumpand
waterdistributor.
Do not use cooler cleaners,
cooler treatments, or other
additives in this evaporative
cooler. The use of any of
these products will void your
warranty and may impair the
life of your evaporative cooler.
MasterCooP II* 5