
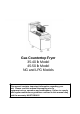
Manual

• Do not salt foods over the fryer.
• Use good-quality shortening.
• Filter shortening daily (at a minimum).
• Replace shortening if it becomes poorly flavored.
• Keep equipment and surrounding area clean.
• Set thermostat correctly.
• Remove excess moisture and particles from food products before placing on fryer.
Draining the Tank
• Turn the thermostat to OFF.
• To keep the pilot lit, turn the gas valve to PILOT.
• Direct the drain spout into the container that you want to drain the shortening into.
• Open the drain valve. The oil will drain into the container. When the container is full or the fryer tank is
empty, close the drain valve. Repeat this step until the fryer is empty.
• If desired, perform the weekly clean-out as described under CLEANING.
• Once tank is completely empty, add new shortening and set thermostat to desired temperature.
Daily Filtering
• Filter shortening at least once a day. Refer to the instructions provided with your filtering equipment.
• A cold fryer will not drain properly.
• Always filter shortening between 250F and 350F.
• The shortening in the cold zone area will remain hard if the heat is only on for a few minutes.
• If necessary, use the clean-out rod to carefully stir the hard shortening to an area above the cold zone where
it will melt.
• Use the tank brush to help clear sides and tubes of debris.
CLEANING - NOTE: To maintain cleanliness and increase service life, the fryer should be cleaned daily. Do not
immerse in water or any other liquid. Hot oil and hot parts can cause burns. Use care when operating, cleaning, and
servicing the fryer.
1. Clean the unit with the tank brush and a damp cloth then polish with a soft dry cloth.
2. Clean all exterior surfaces with warm soapy water.
3. To avoid fingerprints on highly polished surfaces of stainless steel, apply a cleaner that will leave a thin oily or waxy
film.
4. To avoid damage, do not use abrasive cleaners or metallic scouring pads.
5. Use a self-soaping, non-metallic scouring pad for stubborn discolorations.
6. If soap or chemical cleaners are used, be sure they are completely rinsed away with clear water immediately after
cleaning. Chemical residue could damage or corrode the surfaces of the unit.
Boil Out
Procedure should be done weekly or as required.
• Drain the tank as described under DRAINING THE TANK.
• Once the shortening has been drained, flush out scraps and sediment with a small amount of warm
shortening, using tank brush. Allow the tank to drain thoroughly.
• Close the drain valve and fill tank with non-corrosive, grease-dissolving commercial cleaner. Follow the
manufacturer’s instructions. Do not use chlorine or sulfate/sulfide cleaners.
• Add commercial boil-out solution. Solution level must be between the MIN and MAX levels on the fryer
tank.
• Set thermostat to the temperature recommended for the solution being used. Allow solution to simmer for
about 15 to 20 minutes.
• Drain the cleaning solution from the tank.
• Close the drain valve and refill the tank with water. Add 1 cup (1/4 L) of vinegar to neutralize alkaline left
by the cleaner. Solution level must be between the MIN and MAX level on the fryer tank.
• Bring the solution to a simmer only, turn the thermostat off. Allow to stand for a few minutes.
• Drain the tank according to DRAINING THE TANK. Rinse thoroughly with clear, hot water. All traces of
cleaner must be removed. Dry the tank thoroughly.
• Close the drain valve and add shortening. Follow the FILLING TANK WITH SHORTENING procedure in
this manual. The fryer is now ready for use.
MAINTENANCE
- Hot oil and hot parts can cause burns.
- Use care when operating, cleaning, and servicing the fryer.
- Spilling hot fryer compound can cause severe burns.
- Do not move fryer without draining all frying compound from the tank.
- The fryer should be restrained to prevent tipping when installed in order to avoid the splashing of hot liquid.