
Installation Manual


5
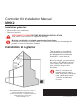
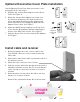
Initial installer setup
After the MHK2 Controller has communicated with
the A/C correctly, MHK2 Controller will change
from the "Wait" screen to the "Initial Installer
Setup" screen and show START SETUP.
1. The MHK2 will search for A/C support. If it
finds A/C support, the controller will load the
Function Code setup. See page 6 for a full
list of Function Codes options. If the controller
does not find A/C support, the controller will
load the Installer Set Up (ISU). See page 7
for a full list of ISU options.
2. Touch or to toggle between Function
Code/ISU options.
3. Touch Edit or touch text area, and then touch
or to edit default setup option.
4. Touch Done or touch text area to confirm the
setting or press Cancel.
5. Touch or to continue to setup another
ISU option.
6. To finish setup and save your settings, scroll
to the FINISH SETUP screen at the end of the
ISU list.
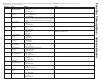
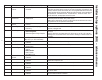
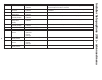
Note: To see a list of all setup parameters, go to
"Installer setup options (ISU) – advanced menu"
on page 7. The MHK2 Controller displays the
ISU name and the ISU number.
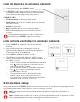
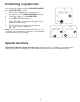
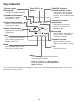
Edit ISU
ISU #
ISU option blinking
Cancels ISU option
selection, go back to
view ISU
Arrow buttons
used to scroll
through ISU
options
Saves selected ISU
option moves on to
the next ISU screen
View ISU
ISU option and
name (scrolling)
Arrow buttons
used to scroll
through ISUs
Installer setup – advanced menu (after initial installation)
Advanced menu options
Function Codes: This is used to access the
device Function Code settings.
Device Setup: This is used to access the device
ISU settings.
Screen Lock: The thermostat touch screen can be
set to fully lock.
System Test: Test the wireless communication or
heating and cooling equipment.
Unenroll Device: Remove a connected receiver or
controller.
To access the advanced menu, press and hold the Menu button for 5 seconds.
Touch or to go through the options in the advanced menu.
Home
HeatHeat
Auto
VaneVane
72
Reset: Access all reset options
on the MHK2 Controller. This is
the only place to access factory
reset.