
User's Manual


Page 35 of 49
F
F
i
i
r
r
m
m
w
w
a
a
r
r
e
e
U
U
p
p
g
g
r
r
a
a
d
d
e
e
Firmware upgrade allows you to update your iSavi
TM
with the latest operating software.
There are two methods for upgrading the iSavi
TM
firmware.
Firmware upgrade by Safe Mode over Wi-Fi
vii. With the terminal off, press and hold ‘Exit Pointing Mode’ button.
viii. Press the ‘Power’ button for 5 seconds.
ix. Release both ‘Exit Pointing Mode’ button and ‘Power’ button.
x. If the Safe Mode is enabled successfully, all the four Antenna Pointing LEDs will turn to
Amber colour, refer to Appendix A: Antenna Pointing LED Status Table.
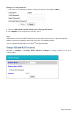
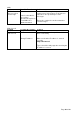
xi. Log in to Web Console by typing http://192.168.1.35 or http://192into the address bar of
any web browser.
xii. Browse to the location of the new firmware, select and click Upload.
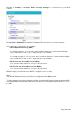
xiii. Firmware upgrade will take approximately 10 to 12 minutes to complete.
You will be prompted with the Result: Firmware Upgrade Completed message.
Note: You are highly recommended to perform firmware upgrade over Wi-Fi. Firmware upgrade
by safe mode over Micro USB is only required when the firmware is corrupted.
Firmware upgrade by Safe Mode over Micro USB
i. With the terminal off, press and hold ‘Exit Pointing Mode’ button.
ii. Press ‘Power’ button for 5 seconds.
iii. Release both ‘Exit Pointing Mode’ button and ‘Power’ button.
iv. If the Safe Mode is enabled successfully, all the four Antenna Pointing LEDs will turn to
Amber colour, refer to Appendix A: Antenna Pointing LED Status Table.
v. RNDIS USB driver file is available in the USB drive which is included in the iSavi
TM
packaging box. You are required to copy the file into your personal computer (Windows XP
or Windows 7).
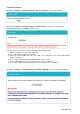
vi. Unzip the attached file and select the .inf as the driver file
vii. Connect the Micro USB cable to your personal computer.
viii. The USB installation should complete with a new network adapter created as USB Remote
NDIS device.
ix. Disconnect or remove any physical ethernet/ Wi-Fi connections of your personal PC and left
only the Micro USB cable which is connected between your PC and your iSavi
TM
.
x. Change the IP address of the USB network adapter to “192.168.1.100”
xi. By having the USB connection, iSavi
TM
is accessible at “192.168.1.37”.
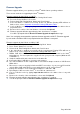
xiv. Log in to Web Console by typing http://192.168.1.37 into the address bar of any web
browser.
xv. Browse to the location of the new firmware, select and click Upload.
xvi. Firmware upgrade will take approximately 10 to 12 minutes to complete.
xii. You will be prompted with the Result: Firmware Upgrade Completed message