
Car Speaker User Manual


23
Counter mounting instructions
Guidelines
Counter mounting brackets are supplied with the sign. Fasteners to attach the mounting brackets to the
sign are supplied. However, fasteners to attach the mounting brackets to a counter are not supplied.
The specific type of fastener needed will vary depending on the physical characteristics of the counter
(e.g., concrete, brick, wood) to which the sign is being mounted. Do NOT install directly to drywall, plasterboard,
or other fragile supports.
• Fasteners for counter-mounting brackets must be appropriate for the type of counter to which the sign
will be mounted.
• Each one of the fasteners must be capable of supporting four (4) times the weight of the sign.
•A sign must be attached to a counter capable of bearing at least four (4) times the weight of the sign.
Directions
1. Disconnect power from the sign.
2. Remove the two screws from each end cap.
NOTE: There are speaker wires behind the right end caps so be careful to keep one hand on the end
cap—continuing to hold it in place—after removing the screws. Pull the end caps away
slowly, so that you don’t accidentally snag the wiring, or damage other components behind
the cap.
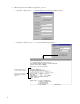
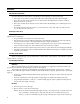
3. When the end caps have been removed, using the screws and nuts provided, loosely fasten two screws
in each mounting bracket as shown below:
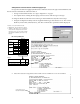
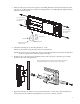
4. Next, slide the screw heads on each mounting bracket into the channel in the back of the sign. Then
tighten the screws on each bracket:
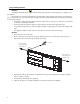
5. Replace the two screws in each end cap. Tighten each screw to 14 lb-in, 1.58 Nm.
6. Fasten each mounting bracket to the counter. (Connection material not supplied.)
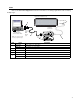
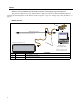
Mounting bracket
Sign is shown with ceiling
mounting brackets attached.