
Technical data


5.11 Termination of the deletion process
Click on [Create] to transmit the deletion report to the destination device via the serial inter-
face. If you click [Abort], you can terminate without outputting a deletion report.
5.11.4.3 Output to a printer
To output the deletion report to a printer, select Printer output. You can choose between the
output to a parallel connected printer (option parallel) or to a USB connected printer (option
USB). Click on [Create] to print out the deletion report. The report is automatically sent on the
connected printer. If you click [Abort], you can terminate without outputting a deletion report.
5.12 Ending the program
5.12.1 End dialog
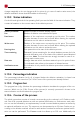
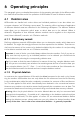
You can end HDShredder at any time. Possibly open
dialog windows have to be closed before. Click then
the end symbol [X] (5.3.2 Operating field) in the
upper right corner of the operating field (fig. 2) or
press <ESC>. The end dialog appears (fig. 17)
where you can quit HDShredder by clicking [Yes] and
return to the program by clicking [No]. Furthermore,
you can cancel HDShredder directly after a termin-
ated deletion process (5.11.3 Final report).
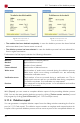
5.12.2 Good-bye screen
After the termination of HDShredder, either via the
end dialog (5.12.1 End dialog) or via the dialog win-
dow with the final report (5.11.3 Final report), a
good-bye screen appears (fig. 18). You can then
shut down the computer or reboot it.
Note: If you do not want to start HDShredder when
you start the computer the next time, remove the
HDShredder boot medium from the boot drive.
36
fig. 17: End dialog
fig. 18: Good-bye screen