
Technical data
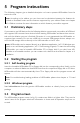


5 Program instructions
The following chapters give a detailed description on how to operate HDShredder, from the
start to the end.
Note: According to the edition you use, there can be deviations between the features de-
scribed or illustrated herein and the features supported by your edition. Please see chapter
1.4 Edition overview for more information on which features your edition supports.
5.1 Preliminary steps
If you want to use USB devices for the following deletion process and your edition of HDShred-
der supports USB, connect these devices before starting HDShredder and leave them connec-
ted until the deletion process is finished. Otherwise it is not guaranteed that HDShredder re-
cognizes them correctly. Do not use a USB hub to connect USB storage devices, always con-
nect the USB storage devices directly to the USB controller or the PC case.
Note: HDShredder can be started directly as a Windows application (5.2.2 Windows pro-
gram) or as a self-booting application (5.2.1 Self-booting program). To start the self-booting
HDShredder, you need a bootable HDShredder CD or floppy disk. If you don’t have HD-
Shredder on a bootable medium, you can create such a device as de-scribed in chapter 4
Installation.
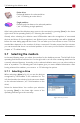
5.2 Starting the program
5.2.1 Self-booting program
Insert the bootable HDShredder CD or floppy disk into the corresponding drive. Switch on the
computer or reboot it. Make sure that BIOS boots from the respective floppy disk or CD drive.
HDShredder will then start automatically from CD or floppy disk and the program screen will
appear.
Note: For troubleshooting loading problems of HDShredder please view chapter 7.1 Load
errors.
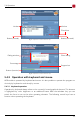
5.2.2 Windows program
Start hdshredder.exe from the genuine HDShredder medium or directly from your software
package.
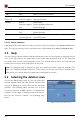
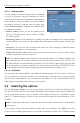
5.3 Program screen
The HDShredder program screen (fig. 2) contains two fields in a lighter blue. They are the
‘active’ area of the program where all information is shown and all operation steps are ex-
ecuted.
21