
Specifications


64 Optimizing IBM Netfinity Servers for SAP R/3 and Windows NT
Creating Array and Logical Drive
To create your logical drive for the Windows NT installation do the following:
1. To create a RAID array select 4. Create/Delete/Copy Log Drive in the
ServeRAID adapter configuration main menu.
2. Select 3. Create Disk Array.
3. Choose drives for the array and press Enter on every drive you wish to place
in the array.
4. Press Esc to create the array.
5. To create a logical drive select 4. Define Logical Drive.
6. Select the array where you want to create the logical drive (Array A).
7. Select a RAID level in the pop-up menu.
8. Select the logical drive size in MB (for example 4000 MB) and confirm with
Yes.
9. All logical drives must be initialized after being created.
10. Confirm with Yes to initialize the logical drive. This procedure initialized only
the first 1024 sectors of the newly created logical drive and will not take a long
time.
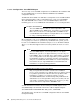
Figure 32. Create Logical Drive
11. If you selected RAID Level 1 for your logical drive then your logical drive is
created. Press any key.
12. RAID Level 5 logical drives must now be synchronized.
13. Confirm with Yes
14. With the ServeRAID II adapter and Firmware V2.30.04 or higher,
synchronization runs in the background and you can now go to the next steps
in the installation. You can also restart or power off the system. The
synchronization will continue after the system restart at the last known point.
15. Press ESC twice to leave the configuration program.