
Specifications
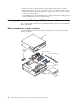


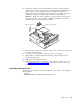

10. Remove the adapter from the static-protective package, carefully grasp the
adapter by the top edge or upper corners, and align it with the expansion slot
guides. Then, press the adapter firmly into the expansion slot. Move the
adapter directly from the static-protective package to the adapter slot. Avoid
touching the components and gold-edge connectors on the adapter.
Attention: Make sure that the adapter is correctly seated in the expansion
slot before you turn on the computer. Incomplete installation of an adapter
might damage the system board or the adapter.
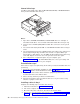
Expansion-slot cover
Adapter-support bracket
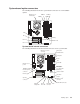
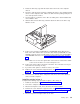
11. Connect required cables to the adapter. Route cables so that they do not block
the flow of air from the fans.
12. If you have another adapter to install, repeat steps 1 through 9.
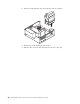
13. Reinstall the rear adapter-support bracket; then, rotate the bracket to the
closed (locked) position.
14. Replace the frame-support bracket.
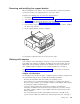
15. If you have other options to install, do so now; otherwise, replace the cover
(see “Replacing the cover” on page 47), reconnect the external cables and
power cords, and turn on the computer.
Installing internal drives
Depending on your computer model, you might have one or more of the following
drives installed:
v Hard disk
v CD-ROM, CD-RW, or DVD/CD-RW combination drive
Installing options 37