
Installation guide
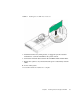
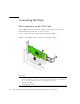
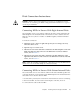
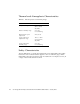
Table Of Contents
- Sun StorageTek™ PCI Express SAS 8-Channel Internal HBA Installation Guide
- Contents
- Preface
- Introduction
- Preparing to Use the SAS HBA
- Installing and Connecting the SAS HBA
- SAS HBA Specifications
- Declaration of Conformity, Regulatory Compliance, and Safety Statements
- Safety Agency Compliance Statements
- Safety Precautions
- Conformité aux normes de sécurité
- Mesures de sécurité
- Symboles
- Modification du matériel
- Positionnement d’un produit Sun
- Niveau de pression acoustique
- Conformité SELV
- Connexion du cordon d’alimentation
- Mise en garde relative aux batteries
- Couvercle de l'unité
- Mise en garde relative au système en rack
- Avis de conformité des appareils laser
- Périphériques CD et DVD
- Einhaltung sicherheitsbehördlicher Vorschriften
- Normativas de seguridad
- Medidas de seguridad
- Símbolos
- Modificaciones en el equipo
- Colocación de un producto Sun
- Nivel de ruido
- Cumplimiento de la normativa para instalaciones SELV
- Conexión del cable de alimentación
- Advertencia sobre las baterías
- Cubierta de la unidad del sistema
- Advertencia sobre el sistema en bastidor
- Aviso de cumplimiento de la normativa para la utilización de láser
- Dispositivos de CD y DVD
- Nordic Lithium Battery Cautions
- Regulatory Compliance Statements
- FCC Class A Notice
- ICES-003 Class A Notice - Avis NMB-003, Classe A
- BSMI Class A Notice
- CCC Class A Notice
- GOST-R Certification Mark
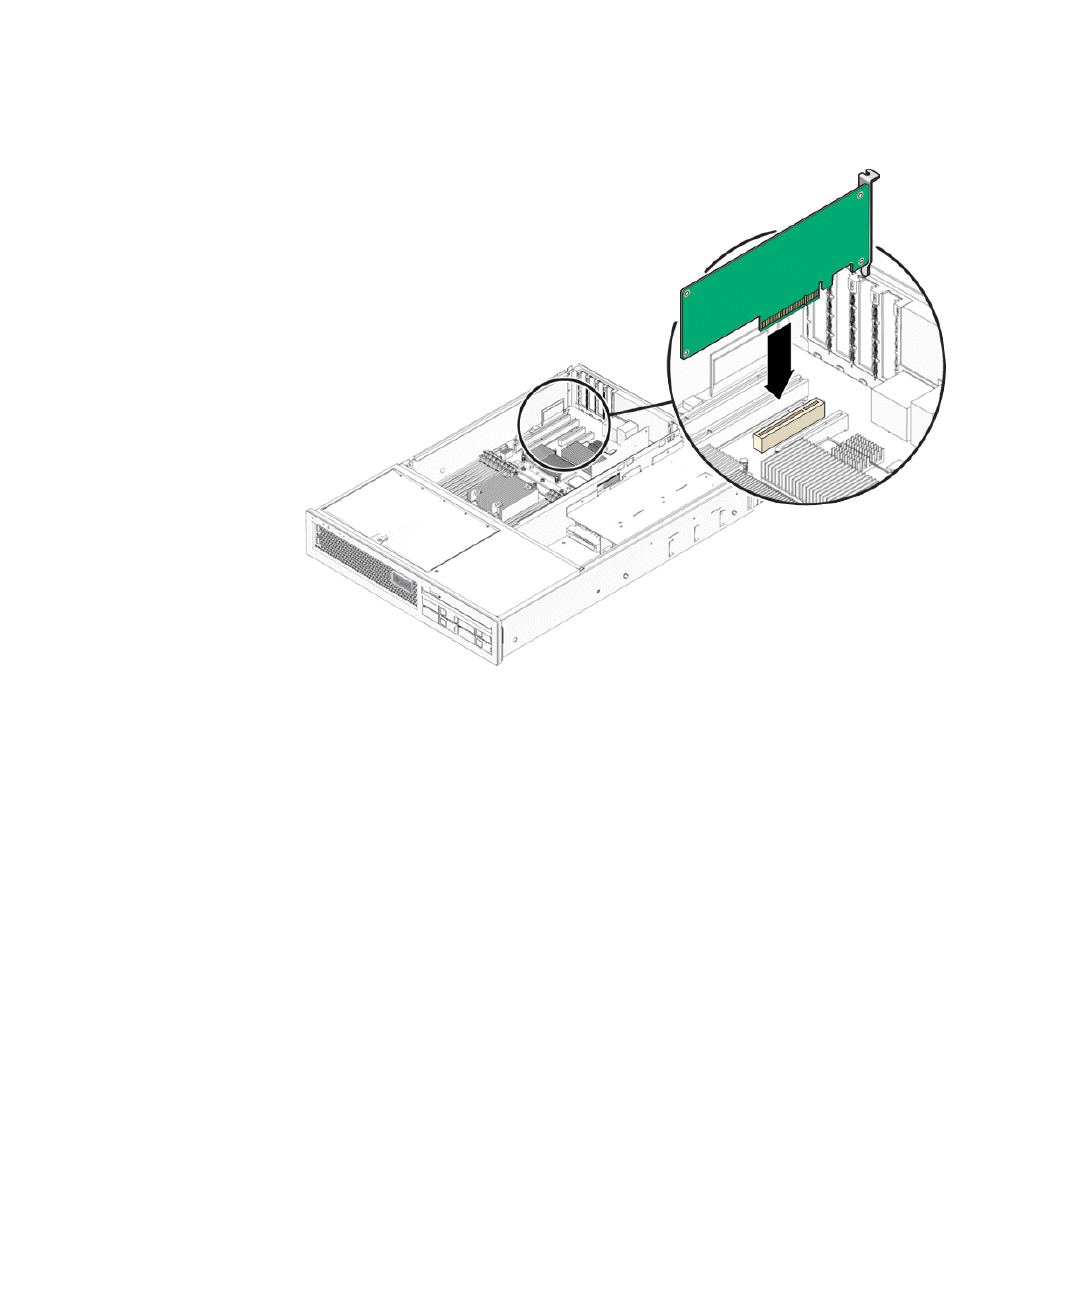
Chapter 3 Installing and Connecting the SAS HBA 13
FIGURE 3-1 Installing the SAS HBA into a PCIe Slot
7. Install the bracket screw, when present, or engage the system’s retention
mechanism to secure the SAS HBA to the system’s chassis.
8. Connect the mini-SAS cables between the SAS HBA and the internal disks.
9. Replace the system’s cover, and reconnect the power cords and any network
cables.
10. Power on the system.
The SAS HBA hardware installation is complete.