
User`s guide


3A-10 A-63054 February 2004
Removing blank images This option allows you to remove the blank rear or front sides produced by the
scanner. If you use this option, you will be asked to verify the batch delete of
the blank images.
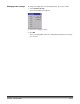
From the main window:
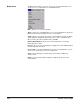
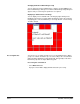
1. Select Batch>Remove Blank Images.
The Remove Blank Images Setup dialog box appears.
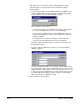
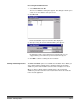
2. Enter the document in the batch where you want verification to begin. The
default is 1.
3. Define the byte size threshold of the images to be verified.
NOTE: A good setting for typical business documents is 5000 bytes in
200 dpi bitonal.
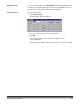
4. If you want to remove only the blank rear sides of the images in a batch,
click the Check only rear sides check box.
5. If you do not want all images pre-selected for deletion, uncheck the
Pre-select all check box to disable this option.
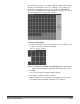
6. Define the number of columns and rows you want to display.
On a 1024 x 768 SVGA screen, a matrix of 14 x 7 allows you to check
98 images per screen for images containing valid data.
7. Click OK to accept the values you entered.