
User guide


1
Installing and Configuring Enhanced OS-9
Enhanced OS-9 for X86 PCAT 15
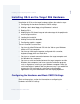
Installing OS-9 on the Target X86 Hardware
Installation of OS-9 on the target hardware follows these basic steps:
1. Configuring the hardware and basic CMOS settings.
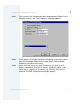
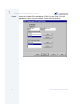
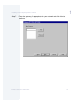
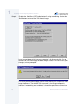
2. Making a basic boot floppy using Microware’s wizard.
3. Booting OS-9.
4. Modifying the OS-9 boot image to take advantage of the peripherals
on the target machine.
5. Loading the hard disk.
6. Making the hard disk bootable.
7. Configuring graphics support.
These instructions assume that:
• You have installed Enhanced OS-9 for the X86 on your Windows
95/98 or NT host computer.
• You have an X86 target computer configured with a monitor,
keyboard, floppy drive and hard drive.
• You have a network connection between the target computer and
the Windows host computer.
• You have a serial connection between the target computer and the
Windows host computer, and have a terminal emulation program,
such as Hyperterm, running on your Windows computer. Note, the
serial connection is optional, but may be necessary if you would like
to move the OS-9 console to a serial port so that graphics
applications may have dedicated use of the display/keyboard.
Configuring the Hardware and Basic CMOS Settings
Refer to the previous section for information on configuring the
hardware and CMOS settings.