
Product Manual

©AdamEquipment2018 25
9.0 CLOCK, SLEEP, AUTO OFF FUNCTIONS
9.1 REAL TIME CLOCK SETUP
The Real Time Clock (RTC) is used only for the RS-232 output. The Date and Time can be
set as required. The scale will keep the clock running even when the power is off.
Setting up the clock
• Press the [SETUP] key to bring up the settings menu. From here you can use digits
[1] and [6] to scroll through the menu. Date and time are set separately.
• Once you have selected either ‘date’ or ‘time’, press the [tare] button to accept.
Setting the time:
• Press the [Tare] key when in the time menu to show the current time counting down
after power is turned on.
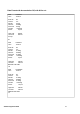
“11,14,06” “16,41,35”
• Press the [0] or [Tare] key to accept the values shown without change or press
the [CE] key to change the time.
• Enter the time using the numeric keys using a 24 hour clock format, 3:41PM is
“154100”.
• Press the [Tare] key to accept the time.
Setting the date:
• Press the [Tare] key to show the current date format in the display.
• Press the digits [1] or [6] to scroll through the date formats and the [Tare] button to
accept. Available formats are:
“Y-m-d” year, month, day
“m-d-Y” month, day, year
“d-m-Y” day, month, year
• Press the [Tare] key to bring up the current date and the [CE] key to clear the current
setting then enter the new values.
• Press the [Tare] key to accept the date.
An error code will be shown if the time (Err 1) or the date (Err 2) is not the permissible values.
For example, 34
th
day of a month is an invalid entry.
Pressing the [0] key will escape for the date and time settings with the current values
unchanged. It is possible to change only the time by setting a new time, then pressing the
[0] key when the date settings are shown.