
Datasheet
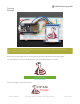
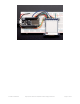


This time you will see the display going through a range
of tests, from pixels, lines, text circles etc.
This shows all the different shapes and techniques you
can use that come with the Adafruit GFX library! Unlike
most e-paper displays, where you can only draw an
image, the built in SRAM lets you have full control over
what shows up on the eInk screen.
Unnecessary Pins
Once you've gotten everything working you can experiment with removing the RST and BUSY pins. We recommend
tying RST to your microcontroller's Reset line so the eInk display is reset when the microcontrollers is. The busy pin
makes startup a little faster but we don't find it to be essential
You can set the code as below to remove control of those pins from the Adafruit_EPD library:
#define EPD_RESET -1 // can set to -1 and share with microcontroller Reset!
#define EPD_BUSY -1 // can set to -1 to not use a pin (will wait a fixed delay)
Thus saving you two pins!
Note that the 2.7" Tri-color display works best if you have a reset pin, it really likes being reset before sending data, so
we recommend keeping it.
Don't forget, after you call drawLine() or print() to display lines or text or other graphics, you must call display()
to make the e-Ink display show the changes. Since this takes a few seconds, only do it once you've drawn
everything you need.
© Adafruit Industries https://learn.adafruit.com/adafruit-eink-display-breakouts Page 24 of 61