
User Manual
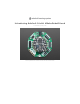

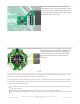

Crickit Tour
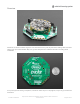
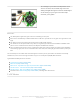
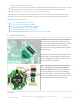
Power Input
Your project start here, where power comes into the
Crickit and is then used to control various motors and
parts. We cover the various ways you can power your
Crickit in the next section, since there's a lot of flexibility
depending on the budget, portability and complexity of
your project.
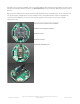
For now, assume you will plug in a 5V wall adapter to the 2.1mm DC jack. This DC jack is the only way to provide
power to Crickit. There's a USB jack (covered at the bottom of this section) but you
cannot power the Crickit that way
(the USB jack is only for debugging seesaw!)
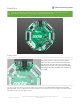
Although the Crickit HAT for Raspberry Pi is not octagonal like other Crickets, the HAT still has the same
features that are listed below, just rearranged to fit the rectangular HAT shape.
© Adafruit Industries
https://learn.adafruit.com/adafruit-crickit-creative-robotic-interactive-
construction-kit
Page 12 of 201