
User Manual

Assembly
Only the Circuit Playground Express + Crickit combination needs assembly, the Feather and micro:bit Crickits have
sockets which the microcontroller plugs into.
The Crickit HAT for Raspberry Pi does not need assembly either, it has female receptors for a male Raspberry Pi
header.
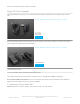
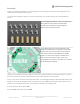
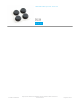
The Circuit Playground Express version of Crickit comes
with a package of six threaded, hexagonal brass
standoffs. These will hold the Circuit Playground
Express above and onto the Crickit.
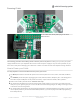
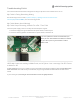
Using a Philips screwdriver and the provided screws,
attach the standoffs to the six large holes on the inside
ring of Crickit. There are three holes near the Adafruit
logo and three more near the Neopixel and speaker
outputs. You do not want to put the standoffs on the
holes on the outside edge of Crickit - there are 8
mounting holes there but these standoffs are needed for
the Circuit Playground Express.
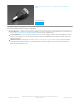
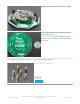
Tighten the screws firm but do not try to tighten excessively. A good mechanical and electrical connection is needed
but excessive torque could crack a circuit board or at least make things hard to take apart later.
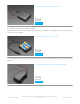
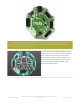
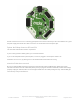
Once you have the six standoffs screwed into Crickit, place a Circuit Playground Express board (ID 3333, not the Circuit
Playground Classic board ID 3000) onto the standoffs with the silver USB-B port of the Express pointing in the same
direction as the Crickit black power jack. This will align the standoffs to the following pads:
4 o'clock: A1, "4:30": A0, 5 o'clock: VOUT
10 o'clock: SDA, "10:30": SCL, 11 o'clock: GND
© Adafruit Industries
https://learn.adafruit.com/adafruit-crickit-creative-robotic-interactive-
construction-kit
Page 31 of 201