
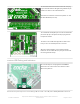
User Manual
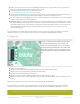

If you have a Feather Crickit then the NeoPixels are driven by the seesaw chip on the Crickit, and you must send
seesaw commands to set colors. But that means no extra pins are needed from your Feather.
If you have a Circuit Playground Crickit then the NeoPixels are driven by the Circuit Playground A1 pad by
default. This way you can use the MakeCode emulator and built in Circuit Playground CircuitPython library.
However, if you want, you can cut the jumper underneath the Crickit and solder closed the ss pad so that the
seesaw chip controls the NeoPixels (for advanced hackers only).
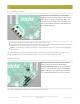
If you have a micro:bit Crickit, NeoPixels are driven by Pin 16. You can use the NeoPixel Extension in MakeCode,
specify Pin 16 as the pin the NeoPixels are connected to and you're set. However, if you want, you can cut the
jumper underneath the Crickit and solder closed the ss pad so that the seesaw chip controls the NeoPixels (for
advanced hackers only).
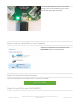
If you choose to have the NeoPixel driven from the seesaw, note it is on seesaw pin #20
Adafruit sells a very wide variety of NeoPixel products - shop here in the Adafruit Store (https://adafru.it/dYn)!
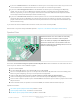
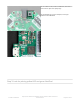
Speaker Drive
Audio animatronics? Yes! Your Crickit can make fairly
loud sounds thanks to the built in Class-D speaker
driver. This will let you amplify audio. However please
note that the Crickit does not in-itself make audio. The
audio must come from the controlling board, such as the
Feather or Circuit Playground.
At this time, we recommend using the speaker with CircuitPython. MakeCode and Arduino can make tones but don't
have easy to use features such as WAV file support.
Class D audio amplifier
Can drive 4Ω to 8Ω speaker. Up to 3W with 4Ω and up to 1W with 8Ω
There's a small potentiometer you can use to adjust the audio volume. By default we set it to the halfway point.
Please be gentle if adjusting, don't try to crank it past the two stop-points.
Ouput is 5VDC BTL (bridge-tied-load) so do not connect to a stereo system or other line-input!
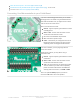
On the Circuit Playground Crickit the speaker is connected directly to the A0 pad (the analog output).
On the Feather Crickit the speaker input is marked Audio on the PCB and you can solder a jumper to the Feather
A0 pin if desired.
On the micro:bit Crickit, the speaker is connected to Pin 0, the standard micro:bit audio output pin.
Speakers to consider:
Thin Plastic Speaker (https://adafru.it/fHu) w/Wires - 8 ohm
Speaker (https://adafru.it/t1b) - 3" Diameter - 8 Ohm 1 Watt
Mini Metal Speaker (https://adafru.it/dDb) w/ Wires - 8 ohm 0.5W
© Adafruit Industries
https://learn.adafruit.com/adafruit-crickit-creative-robotic-interactive-
construction-kit
Page 19 of 201