
Datasheet
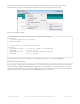
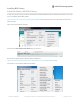

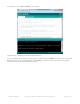


Plug in the Feather 32u4 and wait for it to be recognized by the OS (just takes a few seconds). It will create a
serial/COM port, you can now select it from the dropdown, it'll even be 'indicated' as Feather 32u4!
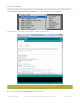
Now load up the Blink example
// the setup function runs once when you press reset or power the board
void setup() {
// initialize digital pin 13 as an output.
pinMode(13, OUTPUT);
}
// the loop function runs over and over again forever
void loop() {
digitalWrite(13, HIGH); // turn the LED on (HIGH is the voltage level)
delay(1000); // wait for a second
digitalWrite(13, LOW); // turn the LED off by making the voltage LOW
delay(1000); // wait for a second
}
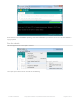
And click upload! That's it, you will be able to see the LED blink rate change as you adapt the delay() calls.
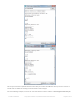
Manually bootloading
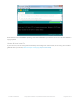
If you ever get in a 'weird' spot with the bootloader, or you have uploaded code that crashes and doesn't auto-reboot
into the bootloader, double-click the RST button to get back into the bootloader. The red LED will pulse, so you know
that its in bootloader mode. Do the reset button double-press right as the Arduino IDE says its attempting to upload the
sketch, when you see the Yellow Arrow lit and the Uploading... text in the status bar.
© Adafruit Industries https://learn.adafruit.com/adafruit-feather-32u4-bluefruit-le Page 37 of 211