
User Manual


Lets start by controlling some servos. You'll want at least one servo to plug in and test out the servo code. Visit our
recommended servo page to check that you have a servo that works (https://adafru.it/Bfo). Once you do, plug in a
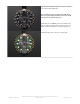
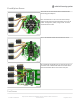
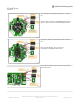
servo into SERVO #1 spot, making sure the yellow or white wire is next to the 1 text label.
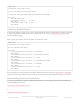
This example will show rotating one servo from 0 to 180 degrees with a stop at 90 degrees.
We start by importing the libraries that we need to have time delays ( import time ) and then the main crickit python
library that will make it super easy to talk to the motors and sensors on crickit ( from adafruit_crickit import crickit )
The crickit object represents the motors and servos available for control. The servos are available on the sub-objects
named servo_1 , servo_2 , servo_3 , servo_4
Each of these are adafruit_motor.servo (https://adafru.it/BMX) type objects for the curious
Control Servo
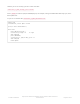
Now that we know the servo objects, we can simply assign the angle! crickit.servo_1.angle = 0 is all the way to the
left, crickit.servo_1.angle = 90 is in the middle, and crickit.servo_1.angle = 180 is all the way to the right. You'll want
to test this to ensure it works with your specific servo, as 0 might be to the right and 180 to the left if it was geared
differently.
More Servos!
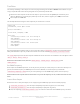
OK that was fun but you want MORE servos right? You can control up to four!
import time
from adafruit_crickit import crickit
print("1 Servo demo!")
while True:
print("Moving servo #1")
crickit.servo_1.angle = 0 # right
time.sleep(1)
crickit.servo_1.angle = 90 # middle
time.sleep(1)
crickit.servo_1.angle = 180 # left
time.sleep(1)
crickit.servo_1.angle = 90 # middle
time.sleep(1)
# and repeat!
Are your servos not moving a full 180 degrees? Don't fret! This is normal, see below about min/max pulse
lengths to 'tune' your servo!
© Adafruit Industries
https://learn.adafruit.com/adafruit-crickit-creative-robotic-interactive-
construction-kit
Page 90 of 201