
User Manual

MakeCode Audio
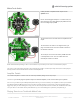
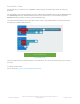
Crickit provides an amplified audio output via the
Speaker block.
For the Circuit Playground Express + Crickit version, we
take advantage of the CPX ability to play WAV files over
the true-analog output pin A0.
The micro:bit version of Cricket also has amplified audio
output.
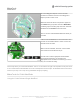
The micro:bit is not shown in the diagram at left, just
plug a micro:bit into the slot in the middle of Cricket in
the direction indicated.
The audio pin used on the micro:bit is pin P0 which has
a small speaker icon on it on the Crickit where the
micro:bit pin numbers are listed.
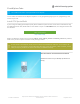
Audio animatronics! By adding a voice or sound effects to your robot you can make a cool interactive project.
This is one of the
few
outputs that does not go through the Crickit's seesaw helper chip. Instead, the audio is played
directly from the microcontroller board and the Crickit amplifies it!
Amplifier Details
The onboard amplifier is a mono "Class D" audio amp with BTL (Bridge Tied Load) output.
That means you cannot plug the speaker output into another amplifier, it must connect directly to a speaker!
You can use just about
any
4 to 8Ω speaker (6 Ω is OK too, just not as common). The amplifier can drive up to 3 Watts
into 4Ω and 1 Watt into 8Ω. That means its ok to drive a 5 Watt speaker, it just wont be as loud as it
could
be with a
bigger amp (but you wont damage the amp). You can also drive speakers that are smaller, like an 8Ω 0.5 W but make
sure you don't turn the audio volume potentiometer up, as it could damage the speaker by overpowering it.
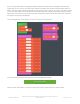
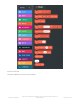
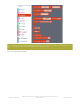
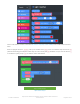
Playing Sounds on Crickit with MakeCode
© Adafruit Industries
https://learn.adafruit.com/adafruit-crickit-creative-robotic-interactive-
construction-kit
Page 77 of 201