
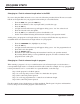
Troubleshooting guide


PROGRAM STEPS
MILLPWR
®
Operation Manual
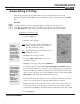
Simple Milling & Drilling
Most of the program steps described in this section can be performed as one-step
milling functions from the DRO screen or included as steps in a program (press the PGM
key).
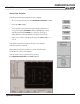
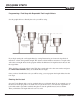
Set Tool
"Set Tool" defines your tool and should appear as the first step in all of your
programs. You should also insert a "Set Tool" step anywhere you want to change
tools.
MILLPWR will apply your latest tool setting to the program steps that follow.
T
o program a “Set Tool” step:
• Press the TOOL key.
• Enter the tool's diameter.
Note:
If you leave the “Diam” field blank, you
will be prompted to provide a diameter
once the program is running.
Note:
Tool length offsets are mentioned later on
within this section.
• Highlight the "Tool Type" field.
• Press the
TOOL TYPES softkey for a list of
available tool types.
• Highlight a tool type, then press the
ENTER key.
• For spindle control, select from the
OFF, FORWARD and REVERSE softkeys.
If you selected "Forward" or “Reverse,” enter a spindle speed. An Operator
Intervention Message (OIM) will prompt you to set the speed and direction
when you run your program. (If your machine's set up to control the spindle,
MILLPWR will adjust the speed and direction for you.)
• Tool Position allows the operator to enter a position to which the tool will
move so you can perform a tool change while running a program.
• Required Change is used if the operator, for any reason, wants to move the
tool into position for a tool change even if there is no tool change actually
required. Pressing
YES for “Required Change” field will activate this prompt.
• Press the USE key.
5-1
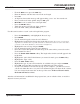
If you press the
TOOL LIBRARY
softkey, high-
light a tool and
press ENTER,
MILLPWR will
fill in the
"Diam,"
"Length" and
"Tool Type"
fields for you.
Consider
entering a
Position/Drill
step before the
Set Tool step.
This will enable
you to go to a
location away
from your work-
piece to change
tools.