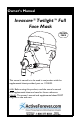
Owner’s Manual Invacare®Twilight™Full Face Mask LATEX FREE This owner’s manual is to be used in conjunction with the supplemental sheet provided, part no. 1150693. Before using this product, read the owner’s manual and supplemental sheet and save for future reference. DEALER: The owner’s manual and supplemental sheet MUST be given to the end user.
SPECIAL NOTES SPECIAL NOTES Signal words are used in this manual and apply to hazards or unsafe practices which could result in personal injury or property damage. Refer to the table below for definitions of the signal words. SIGNAL WORD MEANING DANGER Danger indicates a imminently hazardous situation which, if not avoided, will result in death or serious injury. WARNING Warning indicates a potentially hazardous situation which, if not avoided, could result in death or serious injury.
TABLE OF CONTENTS TABLE OF CONTENTS SPECIAL NOTES ............................................... 2 NOTICE ........................................................... 2 REGISTER YOUR PRODUCT .............................. 3 SECTION 1—GENERAL GUIDELINES .................. 4 SECTION 2—USING THE MASK ASSEMBLY ........ 5 Assembling the Cushion .................................................................... 5 Inspecting the Mask.............................................................................
SECTION 1—GENERAL GUIDELINES SECTION 1—GENERAL GUIDELINES WARNING SECTION 1 - GENERAL GUIDELINES contains important information for the safe operation and use of this product. If oxygen is used in conjunction with a PAP machine and the full face mask, the oxygen flow MUST be turned Off when the PAP machine is not operating. If the oxygen flow is left On, oxygen may accumulate within the tubing, machine enclosure, or the mask surroundings.
SECTION 2—USING THE MASK ASSEMBLY SECTION 2—USING THE MASK ASSEMBLY Assembling the Cushion NOTE: For this procedure, refer to SECTION A in supplemental sheet provided. 1. Remove the cushion from the plastic bag and install onto the mask frame. 2. Align the keying features at the bottom and sides of the cushion to the mating keying features on the mask frame. 3. Gently push the cushion ribbing down into the mounting channel on the mask frame.
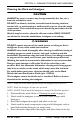
SECTION 2—FITTING THE MASK 3. Check that the valve functions properly by sealing off the cushion facial opening. The valve flap should cover and seal the large opening in the mask swivel. 4. Turn the flow generator Off. The flap should return to a straight position and not be blocking the large opening in the mask swivel. WARNING DO NOT place the mask on your face unless the PAP machine is turned On. Otherwise, injury may occur.
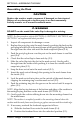
SECTION 2—REMOVING THE MASK AND HEADGEAR Removing the Mask and Headgear NOTE: For this procedure, refer to SECTION D in the supplemental sheet provided. 1. Place your thumb and forefinger around one of the headgear clips (D-1). 2. Gently pull the headgear clip away from your face. NOTE: It is not necessary to remove the headgear straps from the clips or the forehead support when removing the mask. 3. Pull the mask forward and lift it upwards and over the head.
SECTION 3—CLEANING THE MASK SECTION 3—CLEANING THE MASK Disassembling the Mask for Cleaning NOTE: For this procedure, refer to SECTION B, SECTION C, SECTION E, and SECTION F on supplemental sheet. 1. Detach the headgear from the forehead support by unfastening the hook-and-loop fastener tabs from the headgear and sliding the straps out of the slot in the forehead support (SECTION C). NOTE: It is not necessary to detach the clips from the headgear for daily washing unless desired.
SECTION 3—CLEANING THE MASK AND HEADGEAR Cleaning the Mask and Headgear CAUTION ALWAYS be sure to remove any foreign material (dirt, lint, etc.) from the exhalation vents. DO NOT use bleach, chlorine, aromatic-based cleaning solutions, scented oils, or moisturizing or antibacterial soaps to clean the mask components. These solutions may cause hardening and reduce the life of the product. Alcohol may be used to clean the silicone cushion ONLY.
SECTION 3—ASSEMBLING THE MASK Assembling the Mask CAUTION Replace the mask or mask component if damaged or deteriorated. Dispose of any damaged or broken parts in an environmentally friendly manner or as normal household waste. WARNING DO NOT use the mask if the valve flap is damaged or missing. NOTE: For this procedure, refer to SECTION A, SECTION C, SECTION E, and SECTION F on supplemental sheet provided. 1. Inspect all components for damage or wear. 2.
WARRANTY C. Slide the forehead support into the mask frame and place at desired position (E-2). D. Lower the forehead lever to lock the forehead support in the desired position (E-1). 12. Attach the headgear to the mask by sliding the upper headgear straps through the loophole of the forehead support. The tan side of the headgear goes against the head and the Invacare label will be on the outside of the upper strap (SECTION C). 13.